Embark on a strategic journey as we delve into the intricacies of chess strategy, focusing on Grandmaster Max Dlugy’s masterful execution against the Maroczy Bind. In this analysis, we dissect key moments of the game, unraveling Dlugy’s strategic brilliance.
Introduction to the Maroczy Bind:
Central to understanding Dlugy’s triumph is a grasp of the Maroczy Bind, a strategic setup aimed at controlling key squares and limiting Black’s counterplay. As Dlugy navigates the complexities of this structure, we witness the art of strategic maneuvering at play.
Initiating the Sicilian Defense:
The battleground is set as Dlugy opts for the Sicilian Defense, a choice that immediately signals his intent for dynamic play and strategic maneuvering. With precise pawn moves and piece placement, Dlugy lays the groundwork for a nuanced battle.
Strategic Maneuvering:
Dlugy’s strategic finesse becomes apparent as he orchestrates subtle pawn advances and piece maneuvers to probe for weaknesses in the opponent’s position. With each move, he chips away at the opponent’s defenses, setting the stage for a decisive breakthrough.
Exploiting Weaknesses:
As the game progresses, Dlugy seizes tactical opportunities to exploit weaknesses in the opponent’s camp. His prophylactic thinking allows him to anticipate and neutralize potential threats, maintaining a firm grip on the initiative.
The B5 Breakthrough:
One of the pivotal moments arises as Dlugy executes the strategic break with b5, aiming to undermine the opponent’s pawn structure and seize control of the queenside. With surgical precision, he capitalizes on tactical vulnerabilities to gain a decisive advantage.
Endgame Precision:
As the game transitions into the endgame, Dlugy’s precision shines through as he navigates the complexities of the position with ease. With relentless pressure and accurate calculation, he secures victory, showcasing the depth of his strategic understanding.
Conclusion:
In conclusion, Dlugy’s masterful display against the Maroczy Bind exemplifies the art of strategic chess. Through meticulous maneuvering and precise calculation, he dismantles the opponent’s defenses and emerges triumphant. Join us in unraveling the strategic nuances of this captivating encounter, and gain valuable insights into the complexities of chess strategy.
Detailed Instructions are given below:
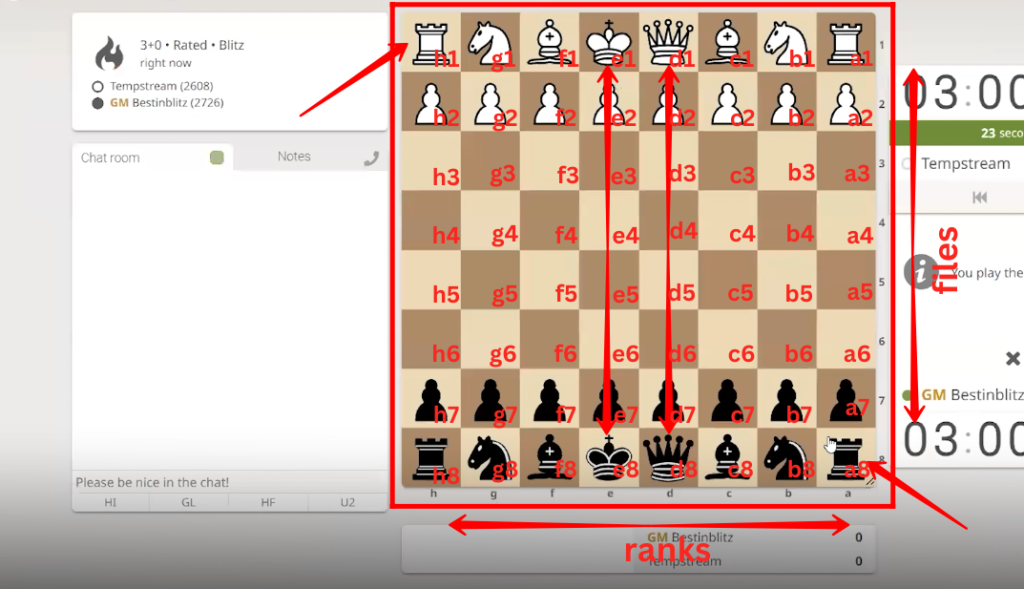
1. The chessboard consists of 64 squares arranged in an 8×8 grid. Each player starts with 16 pieces: one king, one queen, two rooks, two knights, two bishops, and eight pawns, placed on their respective sides of the board. The board is set up so that each player has a white square at the bottom right-hand corner. Each square on the board is uniquely identified by a combination of a letter and a number. The letters represent the files (columns) of the board, ranging from “a” to “h” from left to right, and the numbers represent the ranks (rows), ranging from “1” to “8” from bottom to top. The king is placed on the e1 square for White and e8 for Black, while the queen is positioned adjacent to it on the d1 square for White and d8 for Black. Rest arrangements can be viewed in the screenshot.
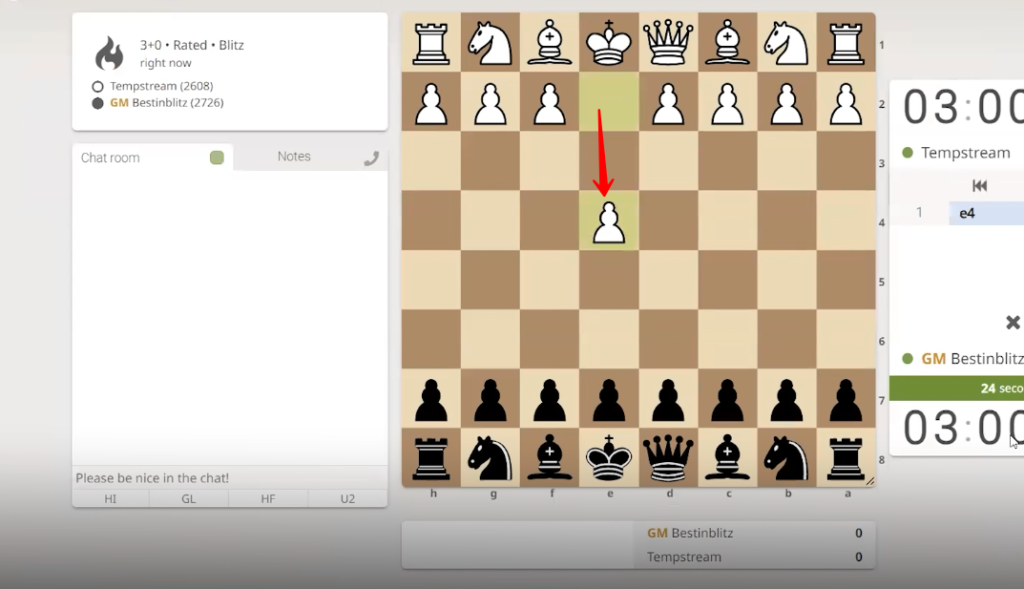
2. The player controlling the white pieces always makes the first move. One white pawn is shifted from “e2” to “e4” square. (Note: Pawns move forward one square at a time, except on their first move, when they have the option to move forward two squares)
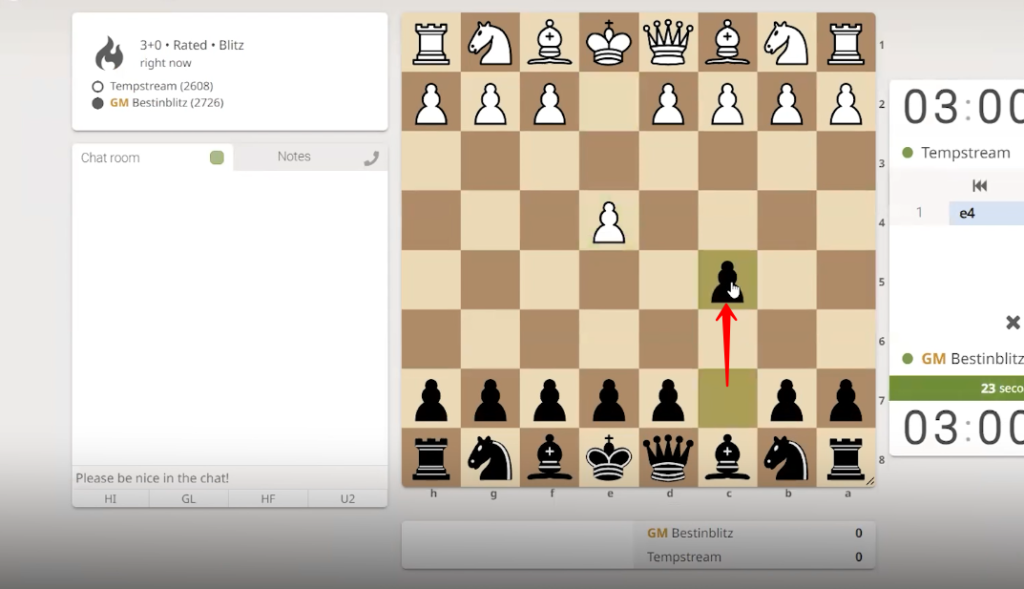
3. The player handling the black pieces moved one black pawn from “c7” to “c5” square.
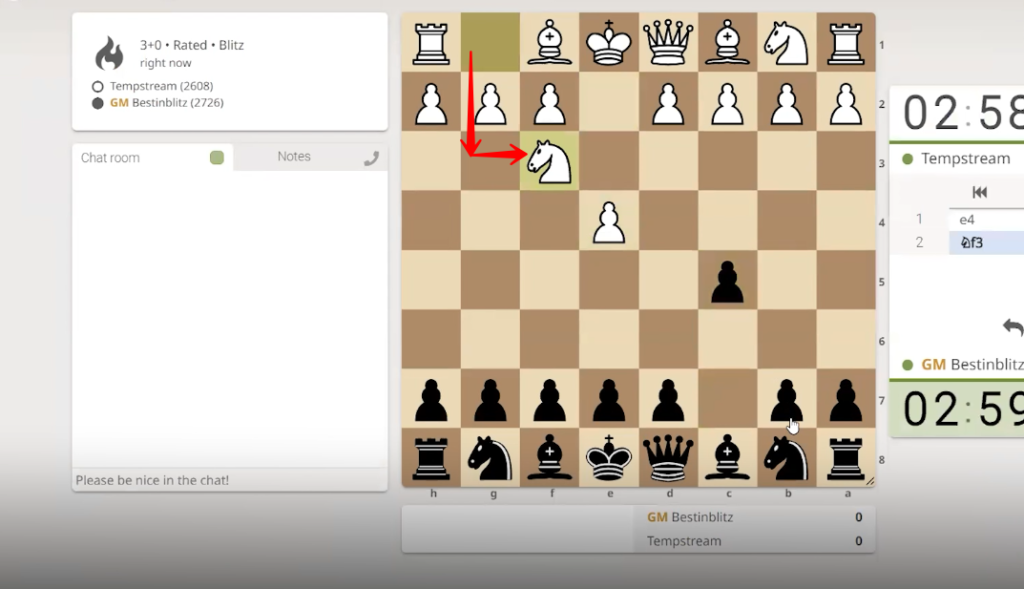
4. One white knight is moved from “g1” to “f3” square. (Note: The knight moves in an “L” shape: two squares in one direction, horizontal or vertical, and then one square perpendicular to that direction)
5. One black pawn is shifted one square forward from “d7” to “d6”.
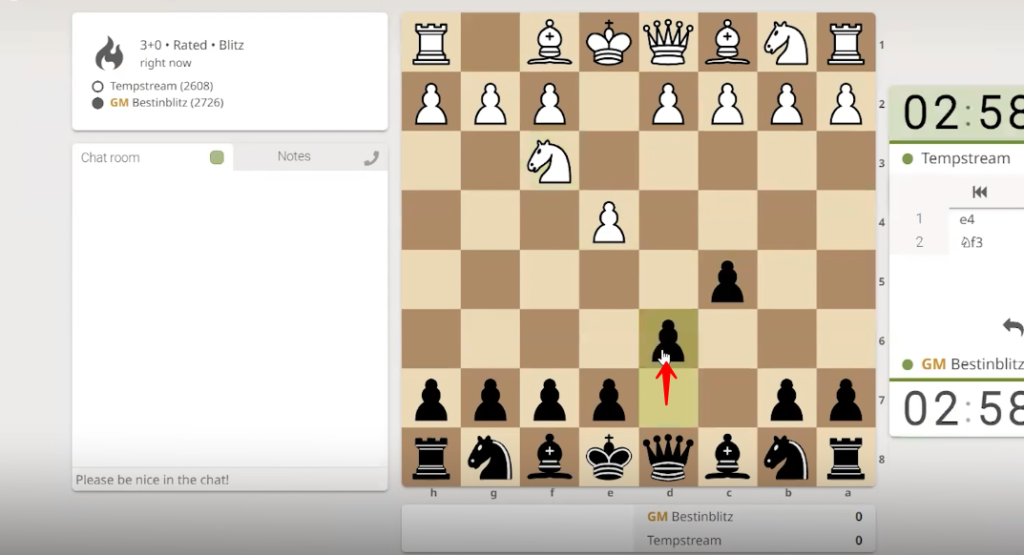
6. One white bishop is shifted from “f1” to “b5” square. Now, the black king is in danger of being captured by white bishop present in “b5” square. (Note: The bishop can move any number of squares diagonally)
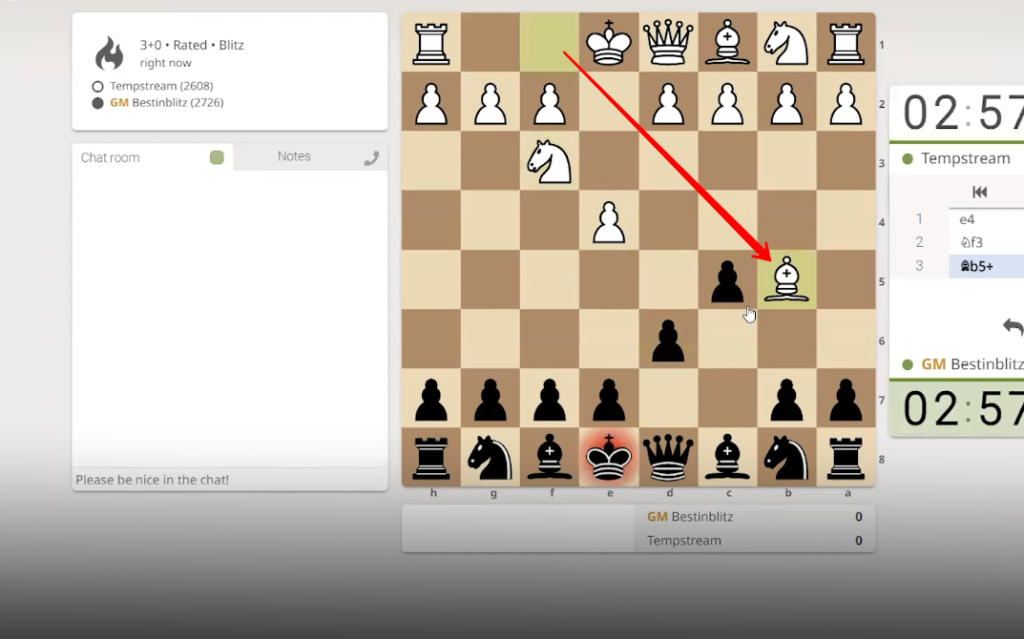
7. One black bishop is moved from “c8” to “d7” square.
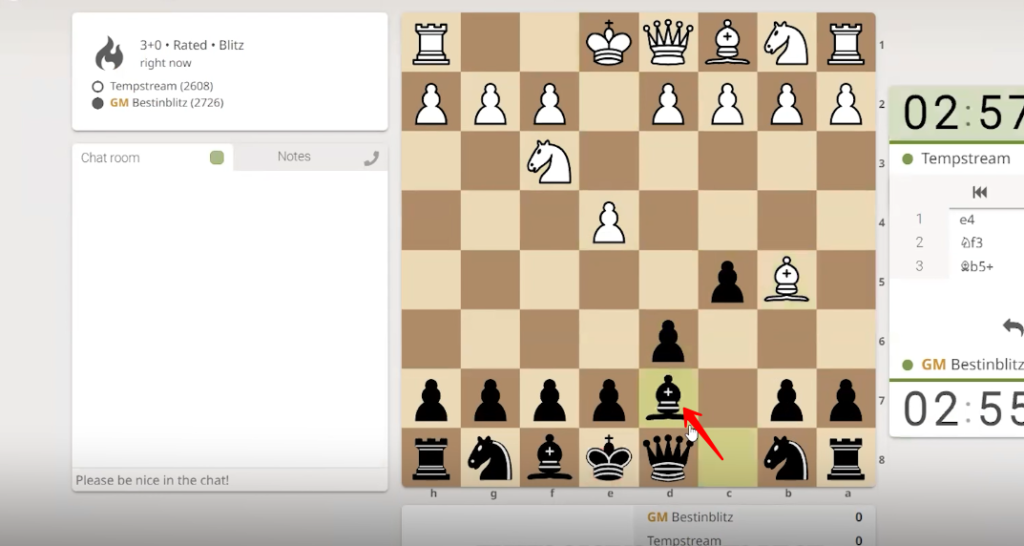
8. The white bishop moved “b5” to “d7” square and captured the black bishop.
9. The black queen is moved from “d8” to “d7” square and captured the white bishop. (Note: The queen can move any number of squares diagonally, horizontally, or vertically)
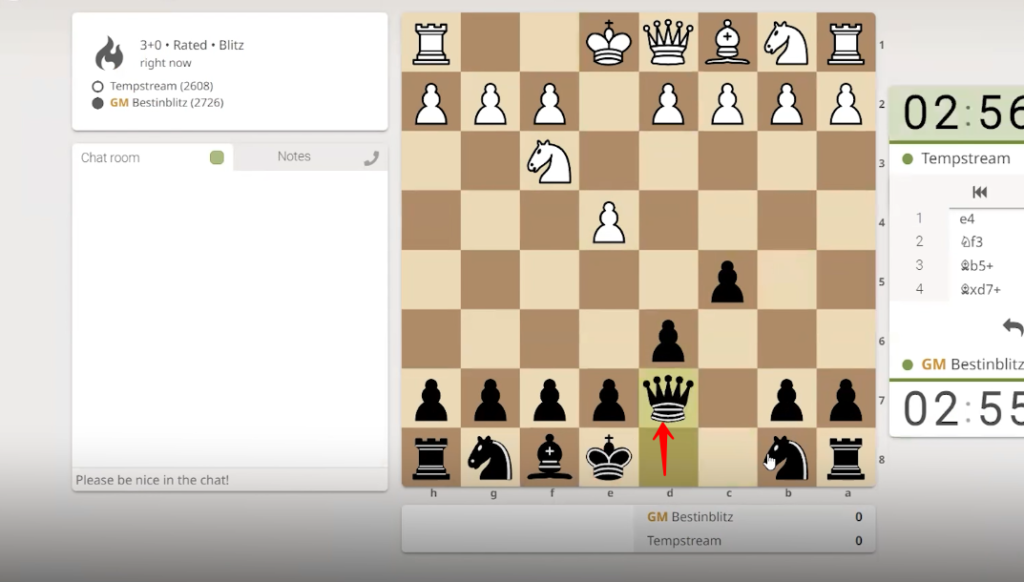
10. The white pawn is relocated from “c2” to “c4” square.
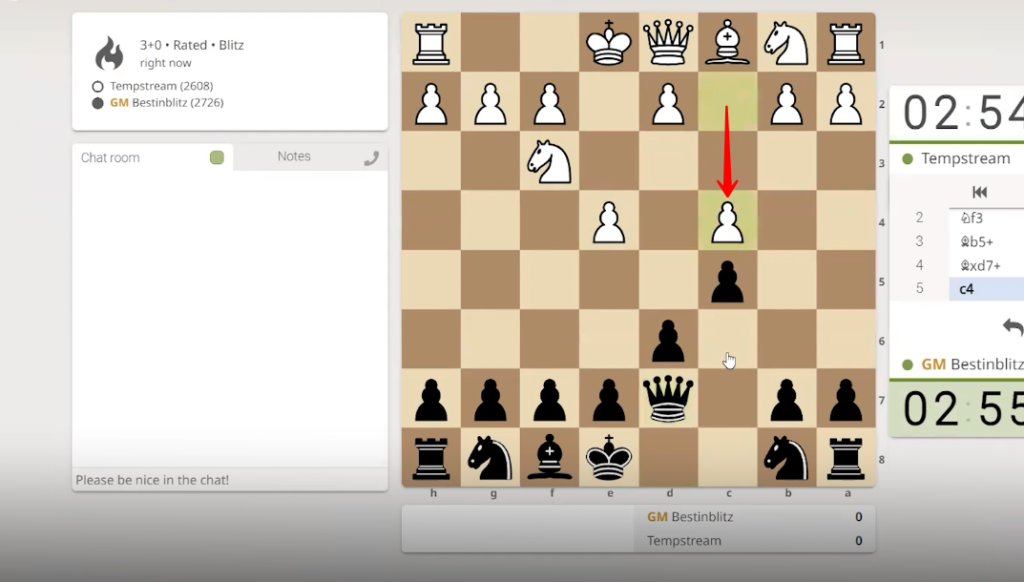
11. Black pieces player moved the one knight from “b8” to “c6” square.
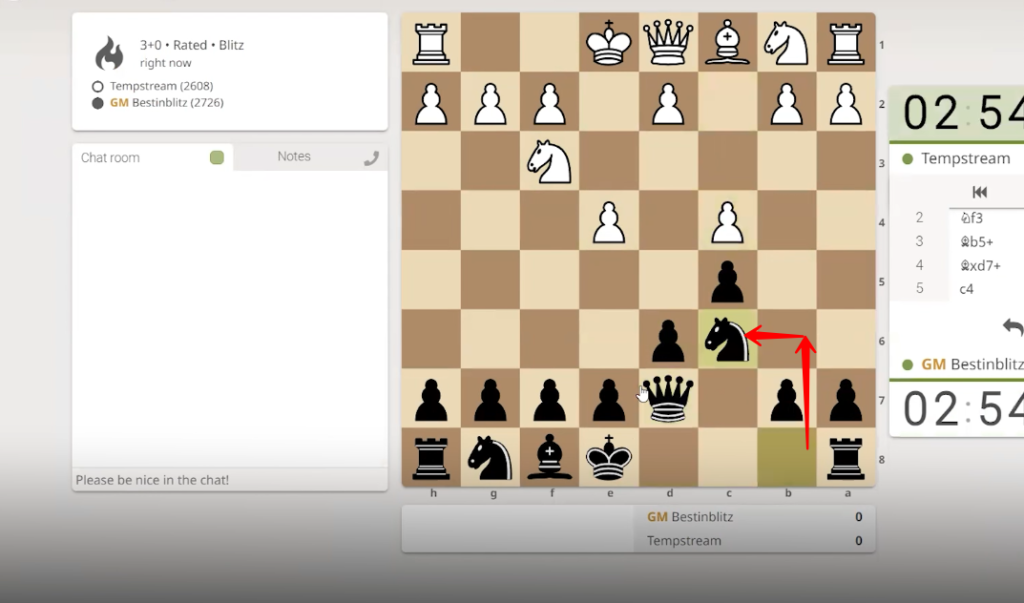
12. White pawn is transferred from “d2” to “d4” square(two steps forward, first move).
13. Black is moved from “c5” to “d4” square and captured by the white pawn. (Note: Pawns capture diagonally)
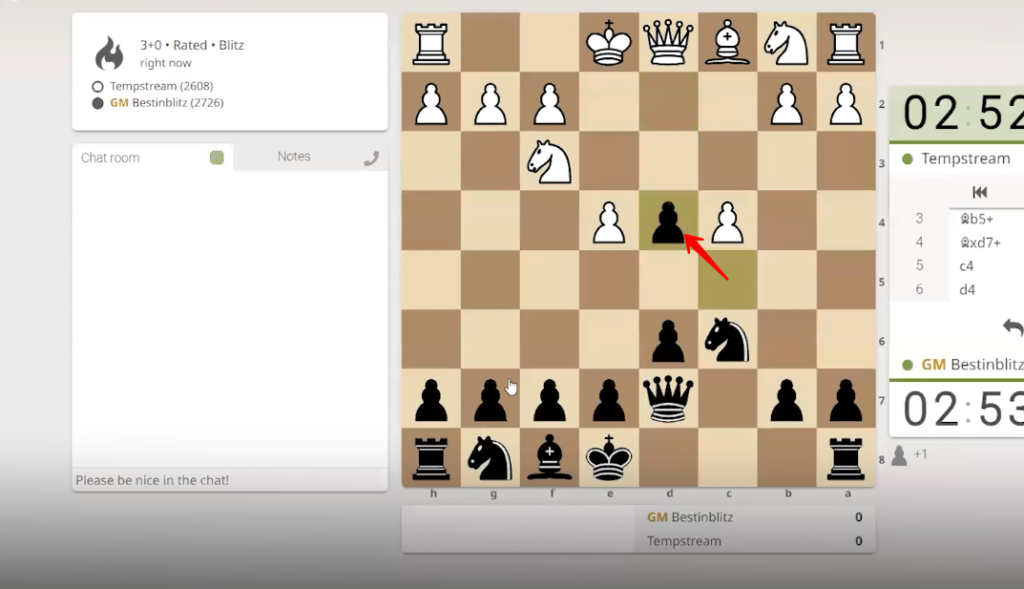
14. White Knite captured the black pawn by moving from “f3” to “d4” square.
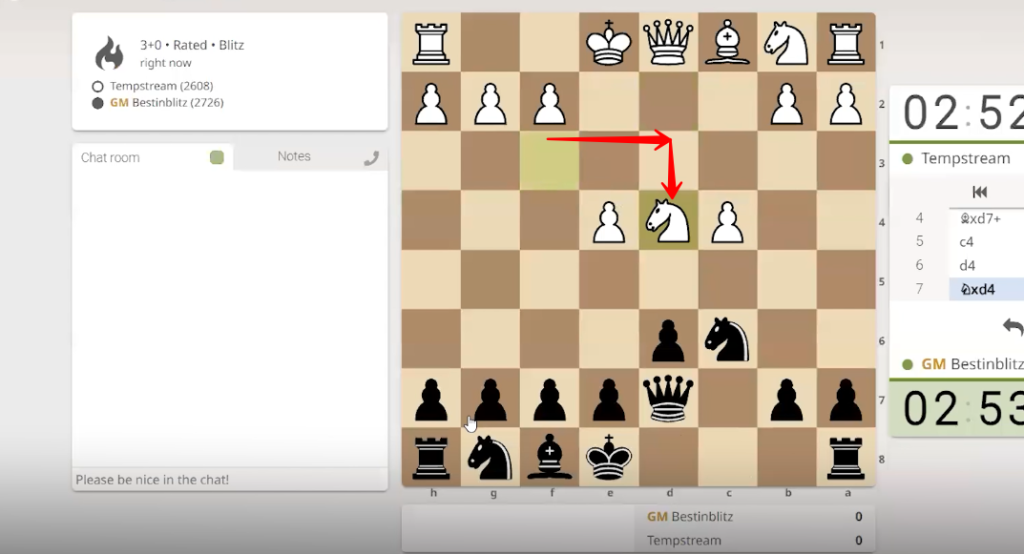
15. The black pawn is transferred from “g7” to “g6” square as a first move.
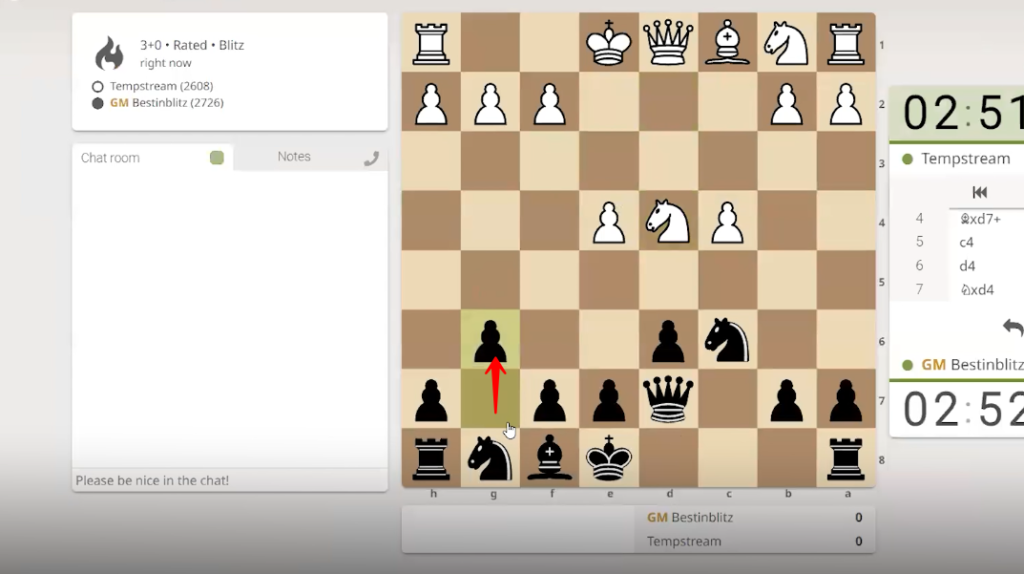
16. Another white knight is shifted from “b1” to “c3” square in its first move.
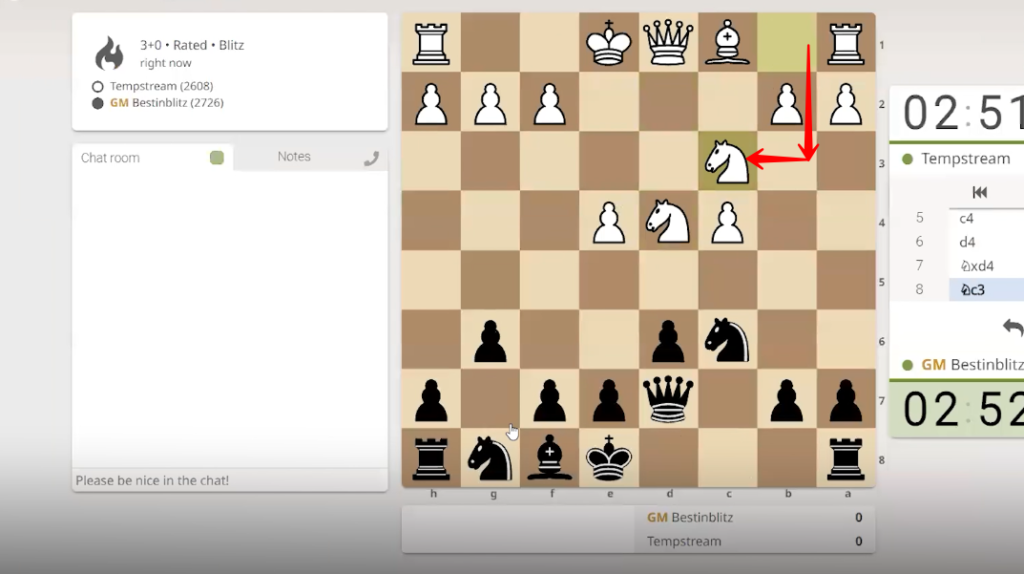
17. The black bishop is repositioned from “f8” to “g7” square, diagonally.
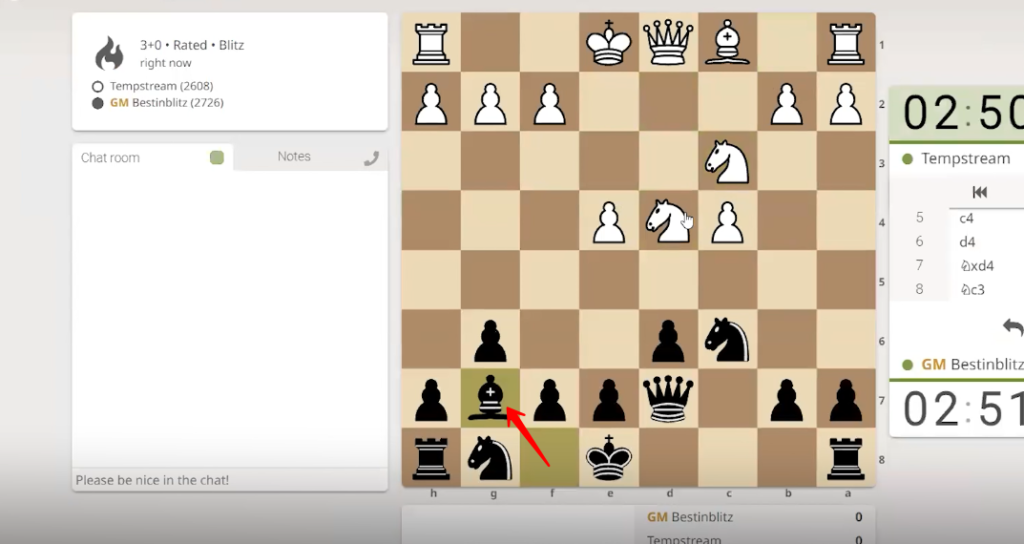
18. The white bishop is displaced from “c1” to “e3” square, diagonally.
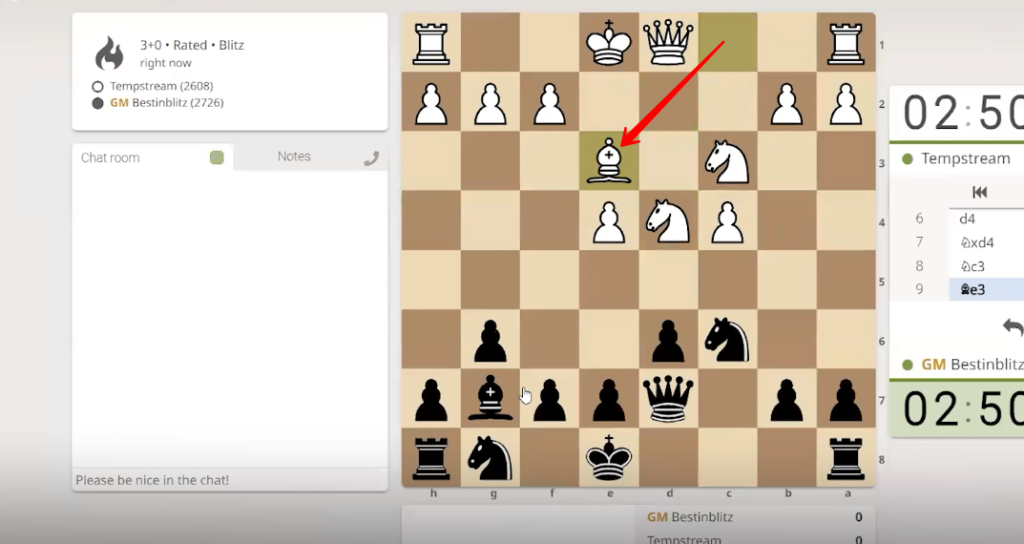
19. The black knight is moved from “g8” to “f6” square.
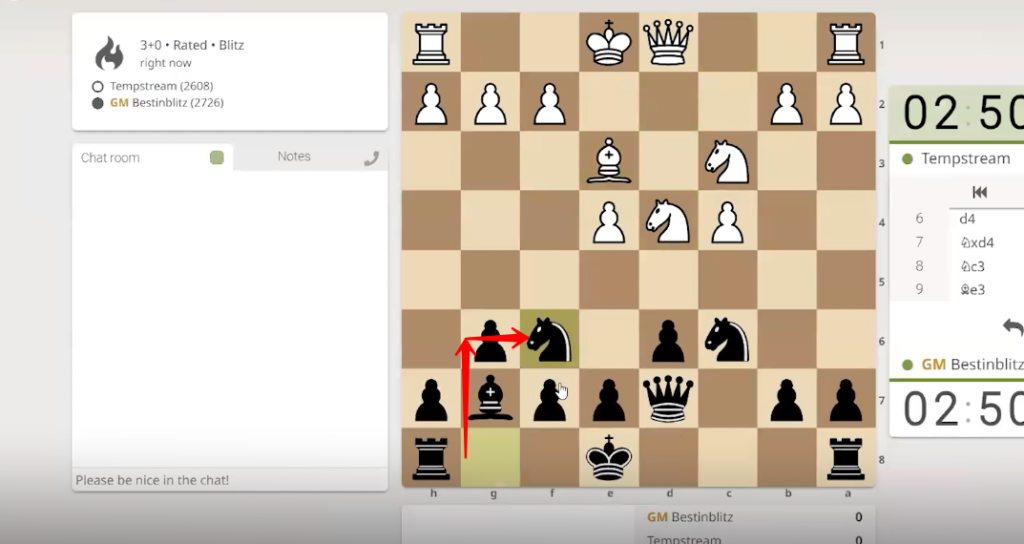
20. The white pawn is relocated from “f2” to “f3” square.
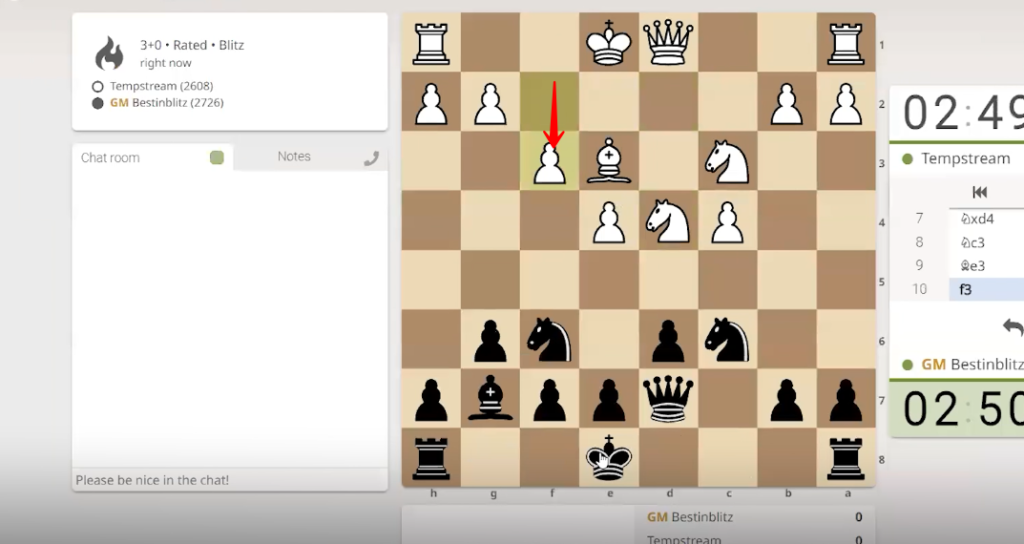
21. This is a special move involving the king and one of the rooks. It allows the king to move two squares toward a rook on its initial square and then the rook moves to the square next to the king, on the opposite side of the king. (Conditions: Neither the king nor the rook involved in castling have moved previously in the game and there are no pieces between the king and the rook involved in castling.)
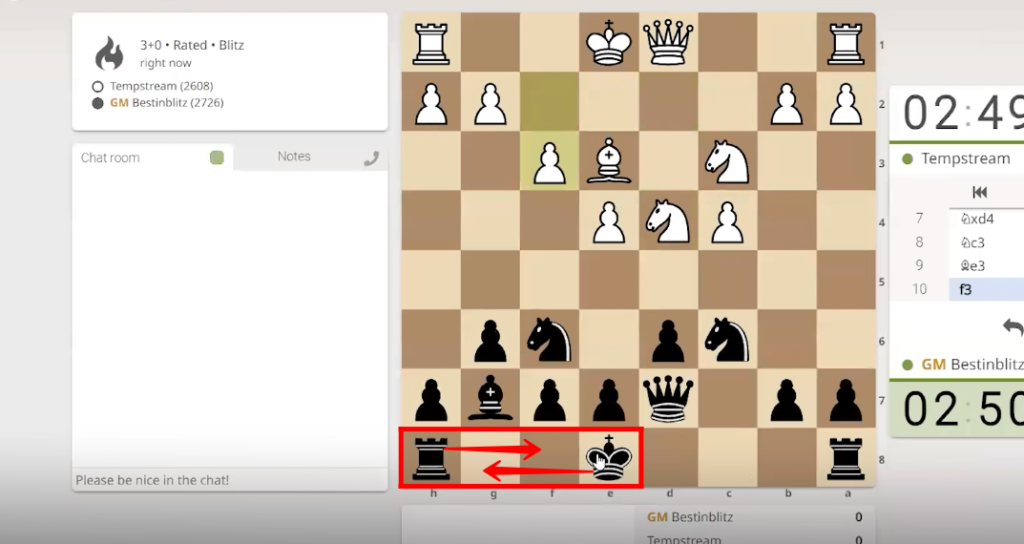
22. Now, the king (“g8”) and the rook (“f8”) moved according to rule. (Note: i. The king can move one square in any direction. ii. The rook can move any number of squares horizontally or vertically.)
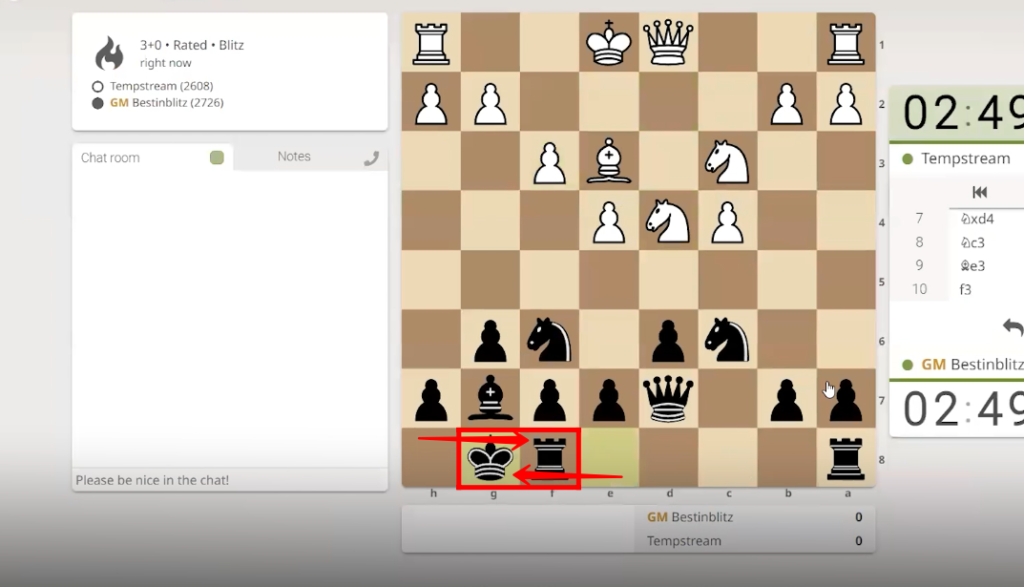
23. The white rook is moved from “a1” to “c1” square. Then, the black rook is moved from “f8” to “c8” square.
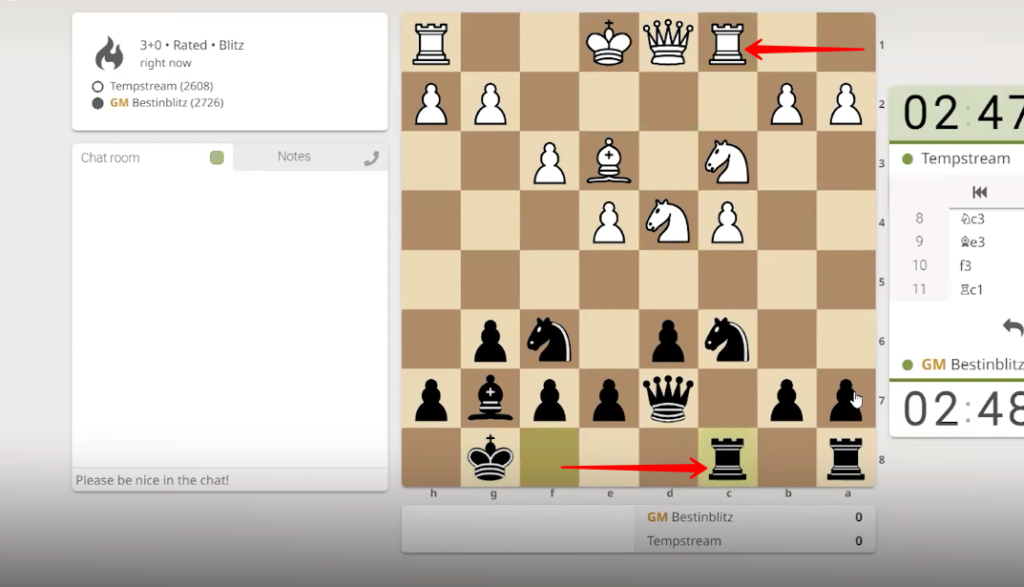
24. The white pawn is repositioned from “b2” to “b3” square in its first move.
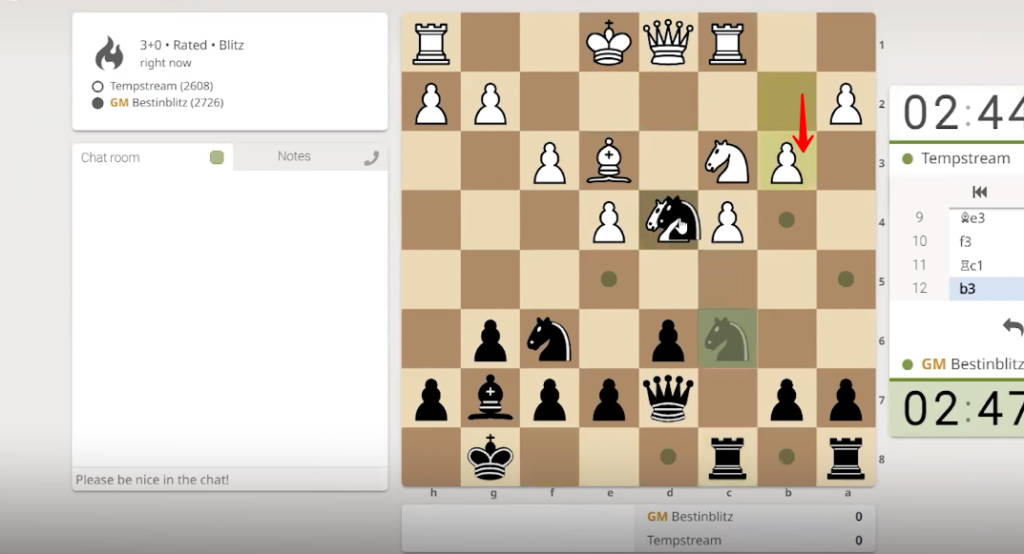
25. The black knight moved from “c6” to “d4” square and captured the white knight.
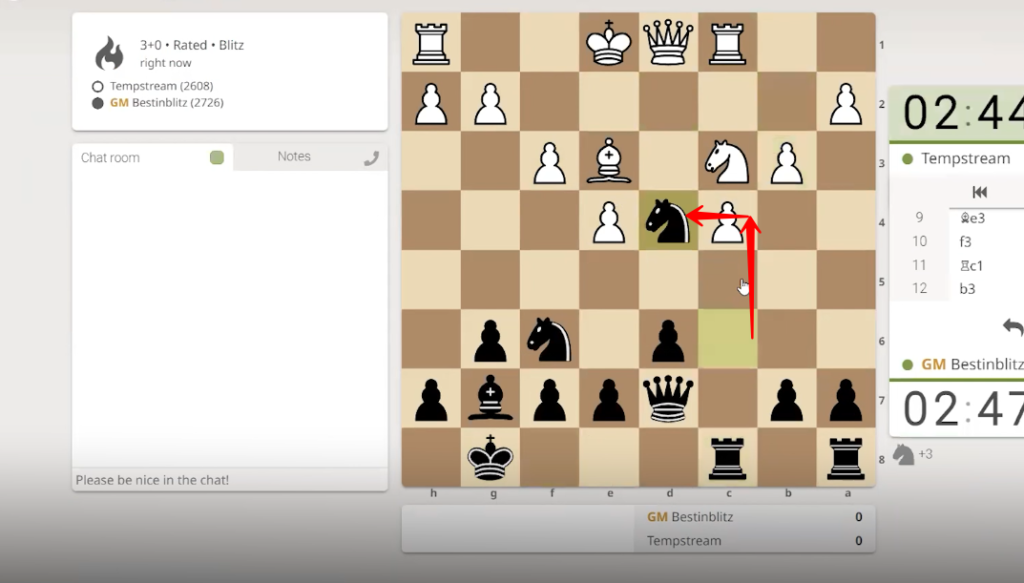
26. The white bishop is moved from “e3” to “d4” square and captured the black knight.
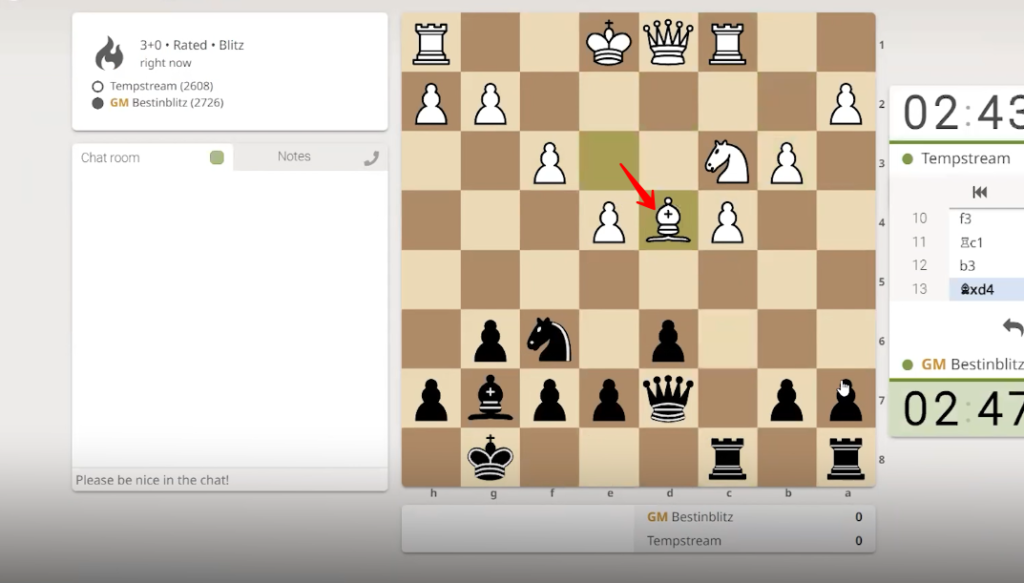
27. The black queen is stepped back and moved from “d7” to “d8” square.
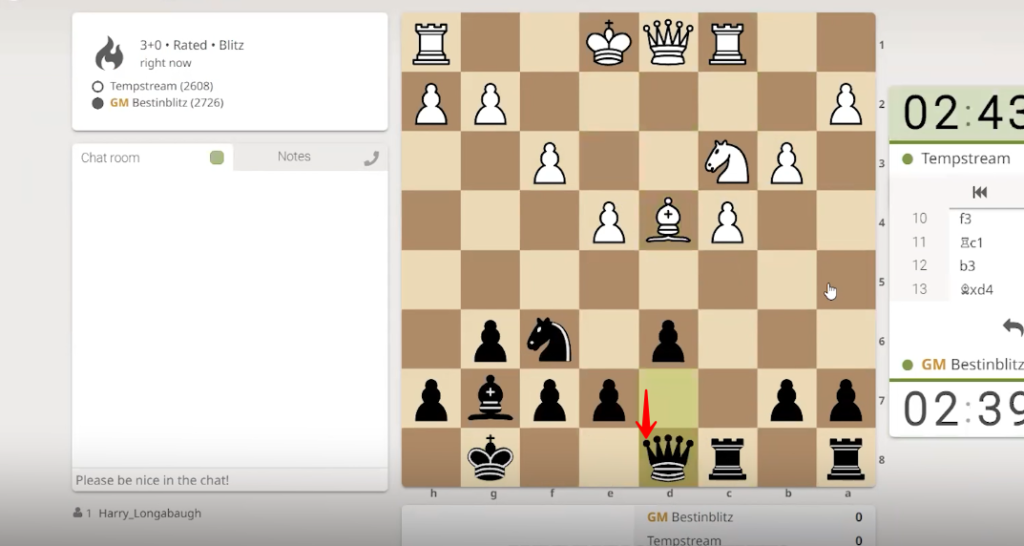
28. Now, the white king and the white rook are in the condition of casting.

29. The white king(“g1”) and the rook (“f1”) moved according to rule.
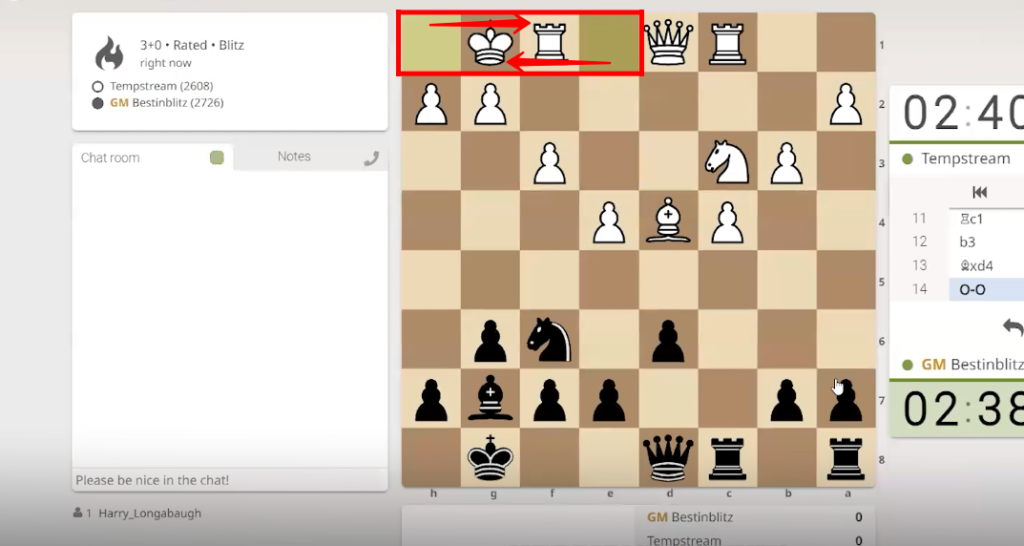
30. The black pawn moved from “a7” to “a6” square.
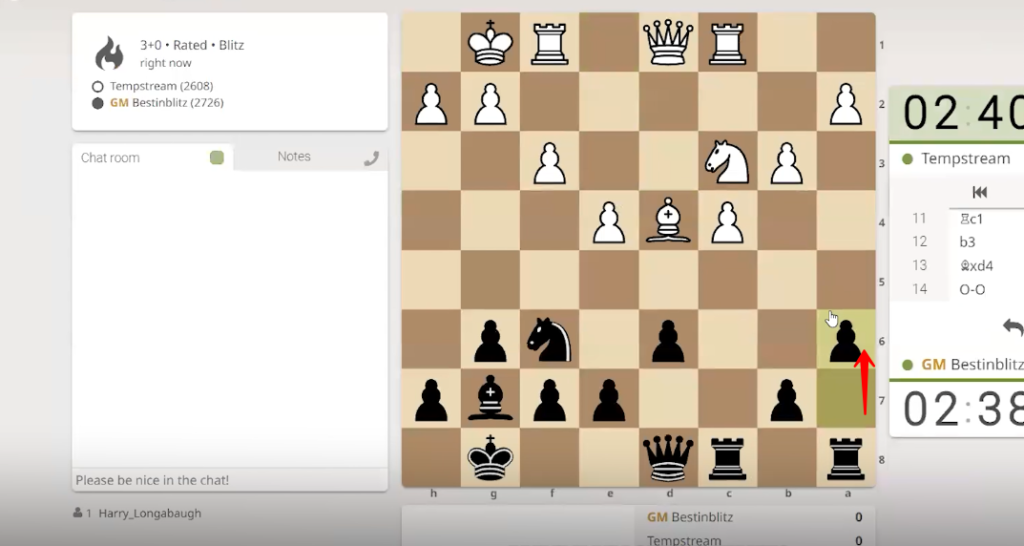
31. The white pawn is shifted from “a2” to “a4” square.
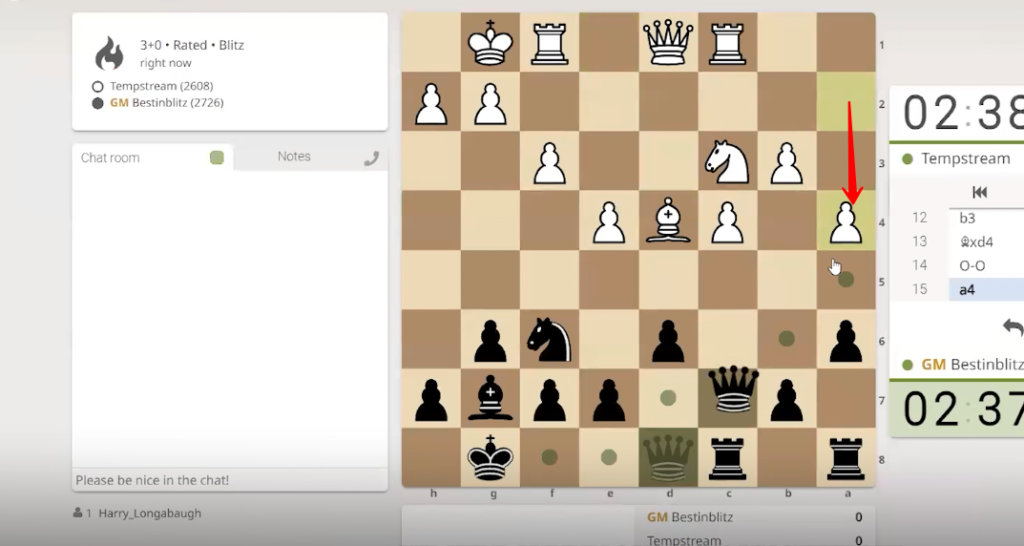
32. The black queen is transferred from “d8” to “a5” square.
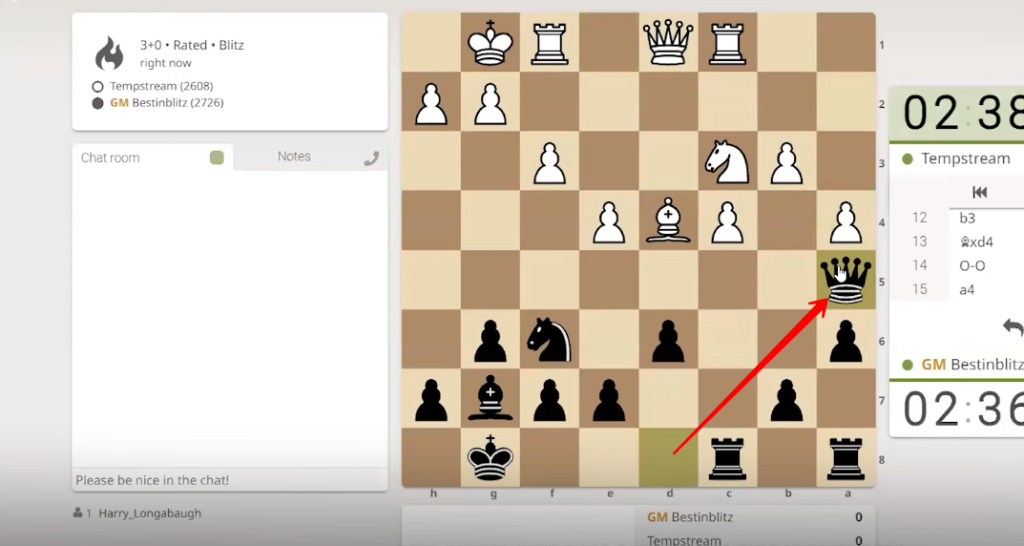
33. The white bishop is displaced from “d4” to “e3” square.
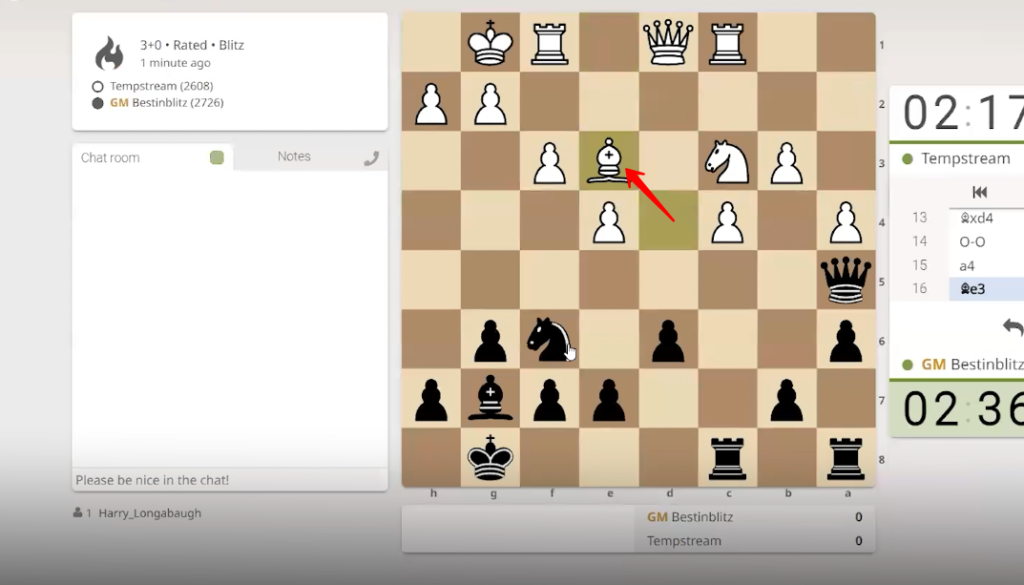
34. The black knight is relocated from “f6” to “g4” square.
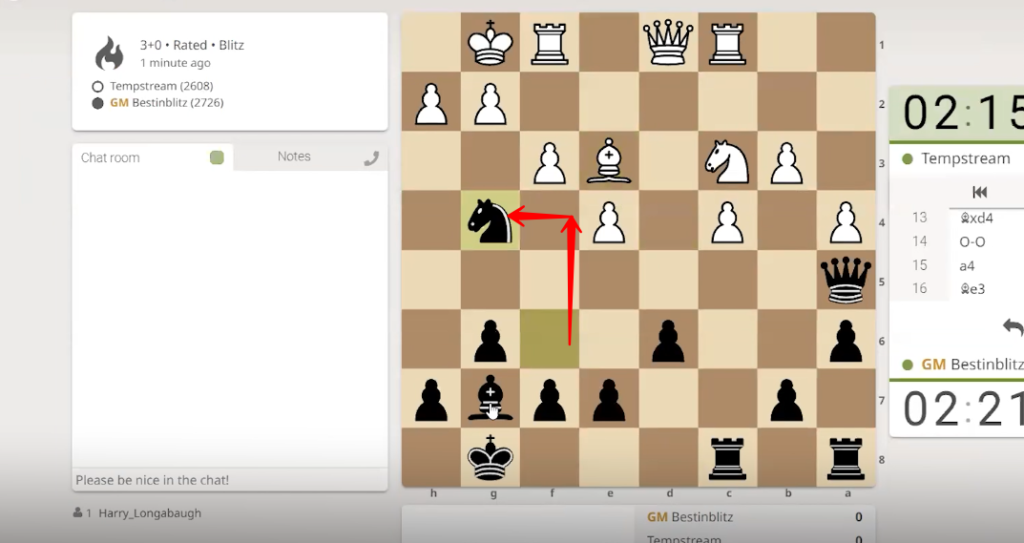
35. The white pawn captured the black knight and shifted from “e3” to “g4” square.
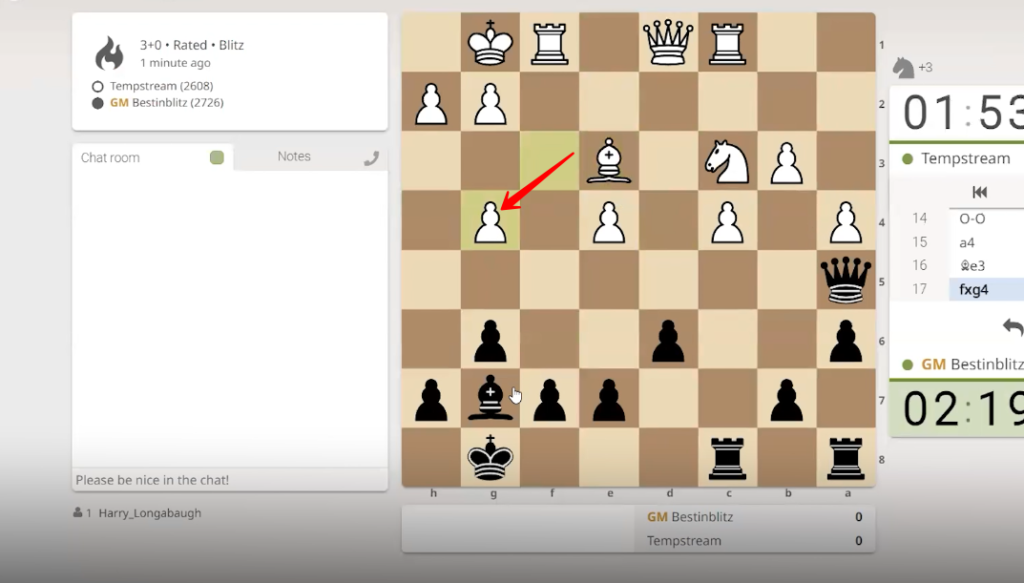
36. The black bishop captured the white knight and moved from “G7” to “C3” square.
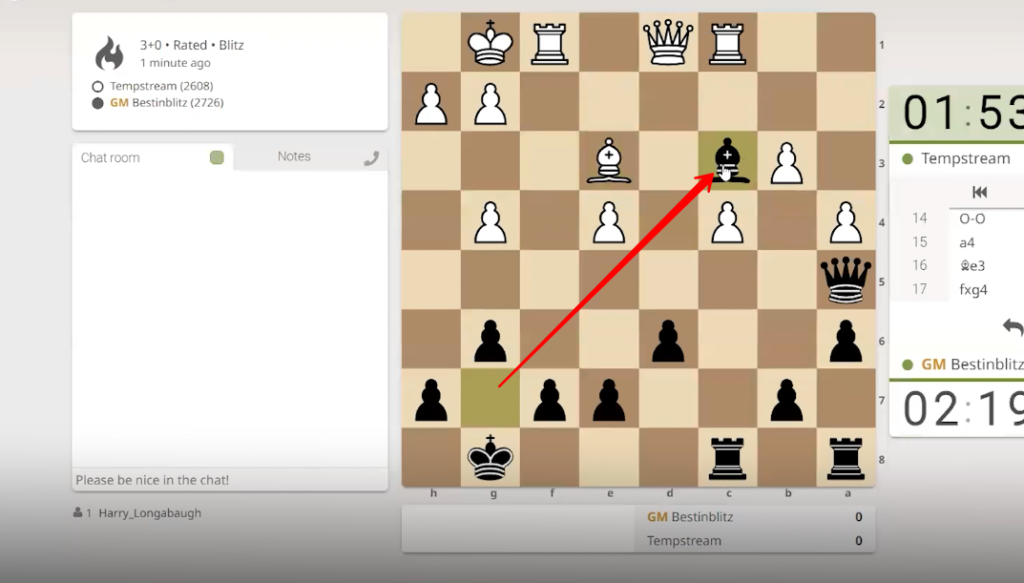
37. The white queen moved diagonally from “d1” to “f3” square.
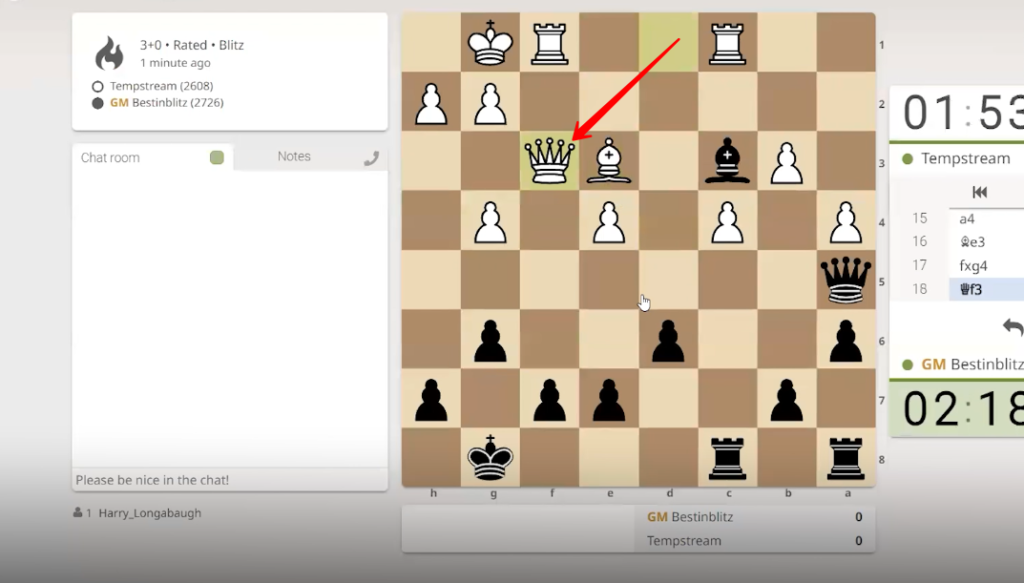
38. The black rook is repositioned from “c8” to “f8” square.
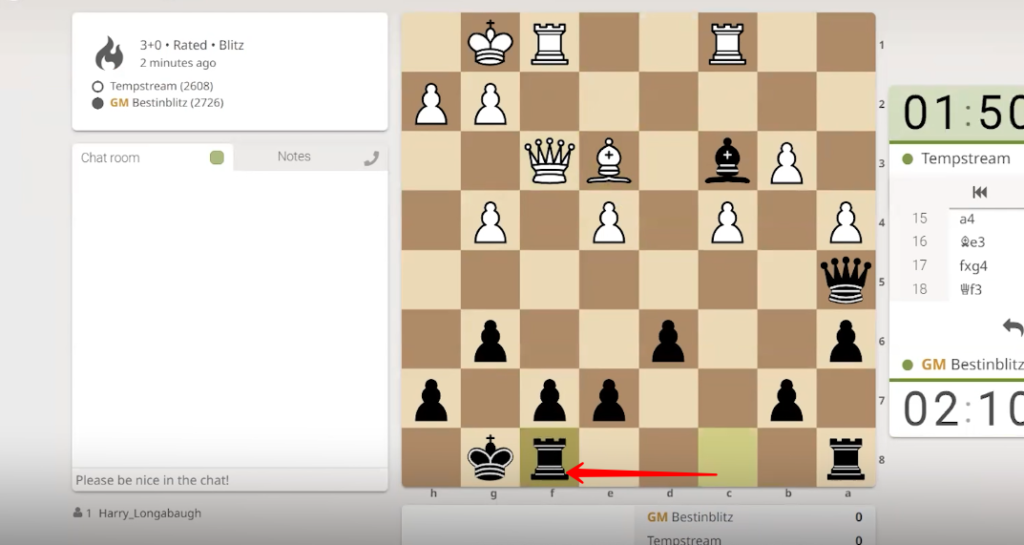
39. The white rook is shifted from “f1” to “f2” square.
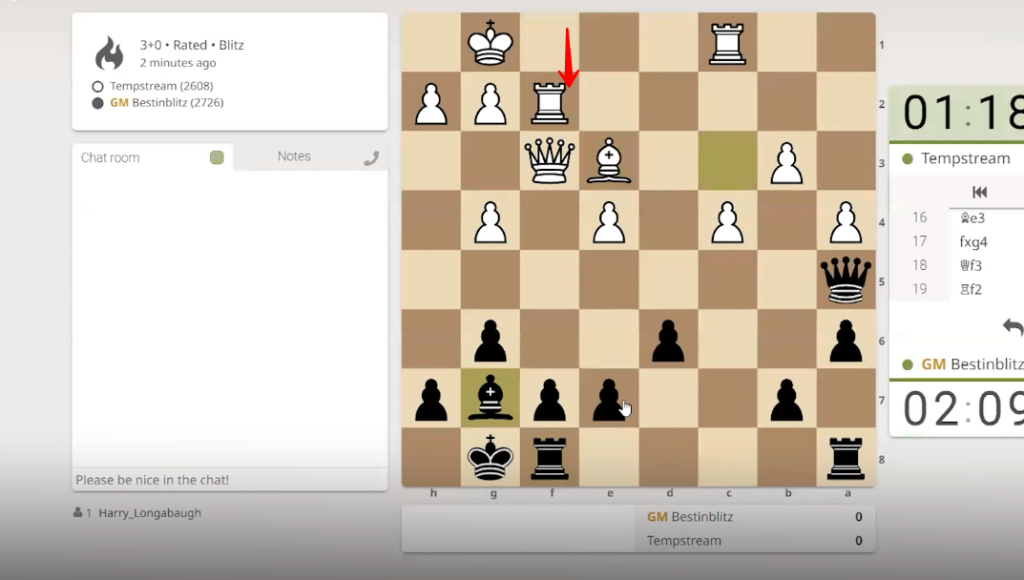
40. The black bishop is displaced diagonally from “c3” to “g7” square.

41. The white rook is shifted from “c1” to “f1” square.
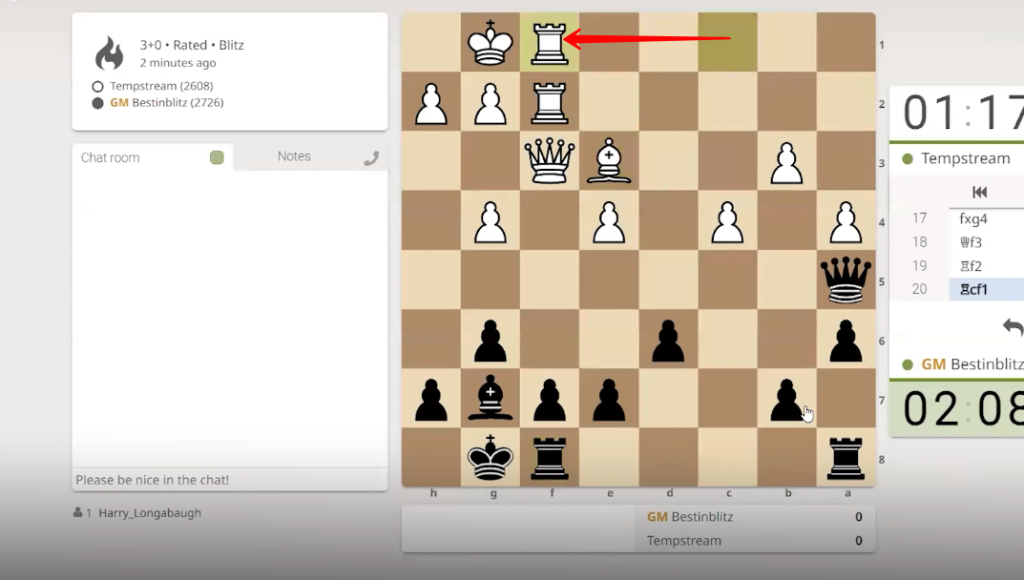
42. The black pawn is transferred from “b7” to “b5” square just beside the black queen.
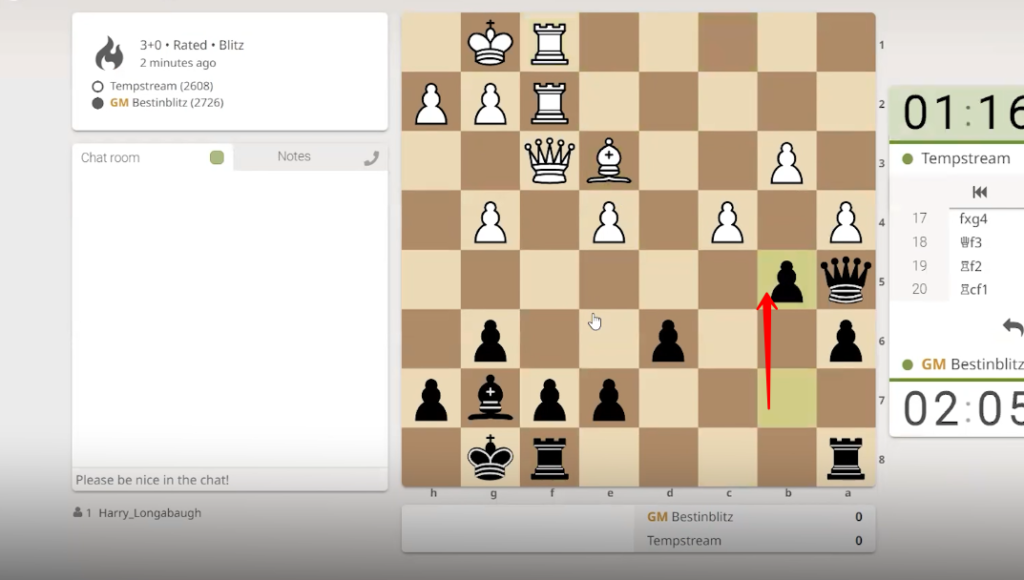
43. The white pawn moved diagonally from “a4” to “b5” square and captured the black pawn.
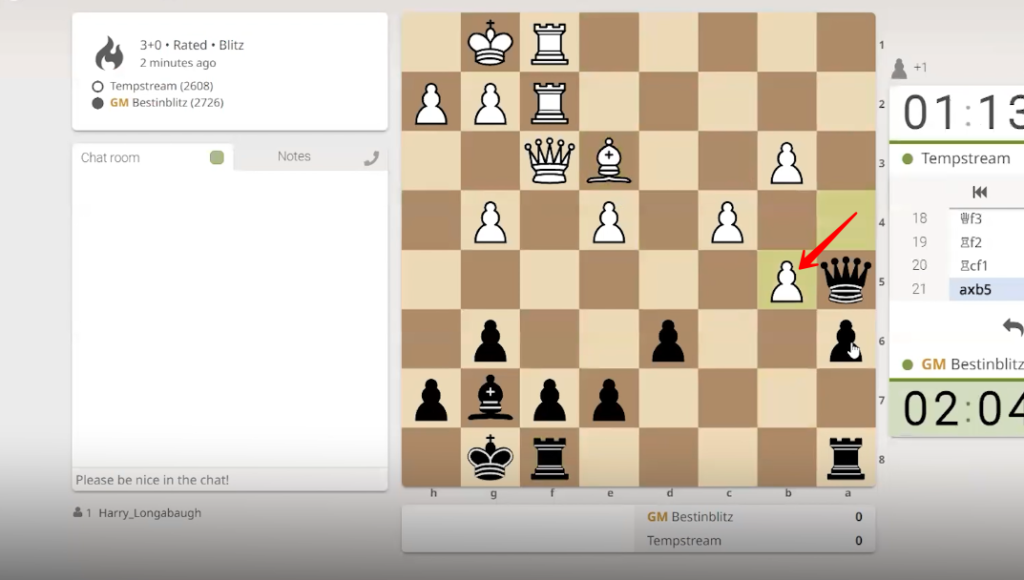
44. The black pawn captured the white pawn by moving diagonally from “a6” to “b5” square.
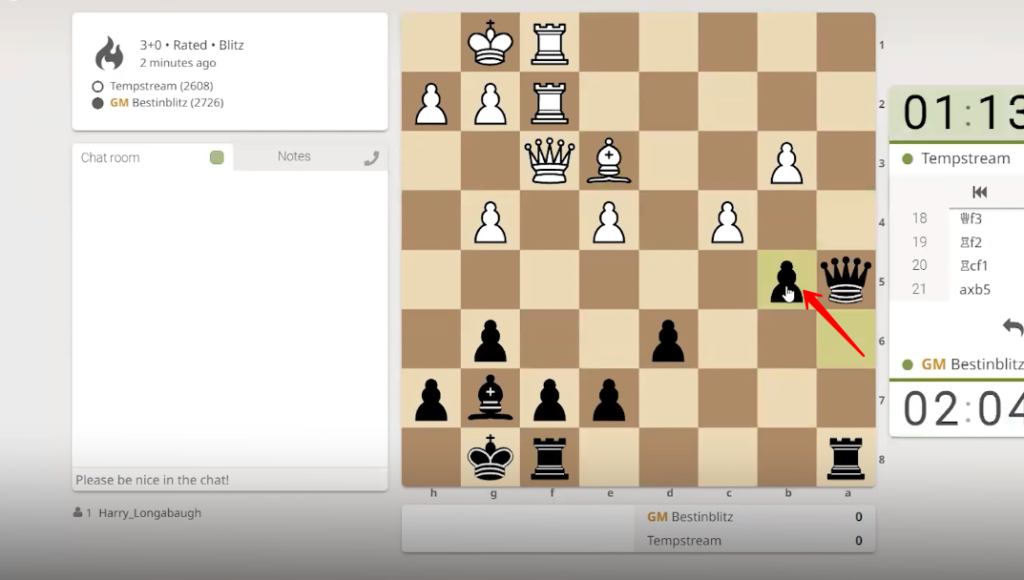
45. The queen moved diagonally from “f3” to “e2” square.
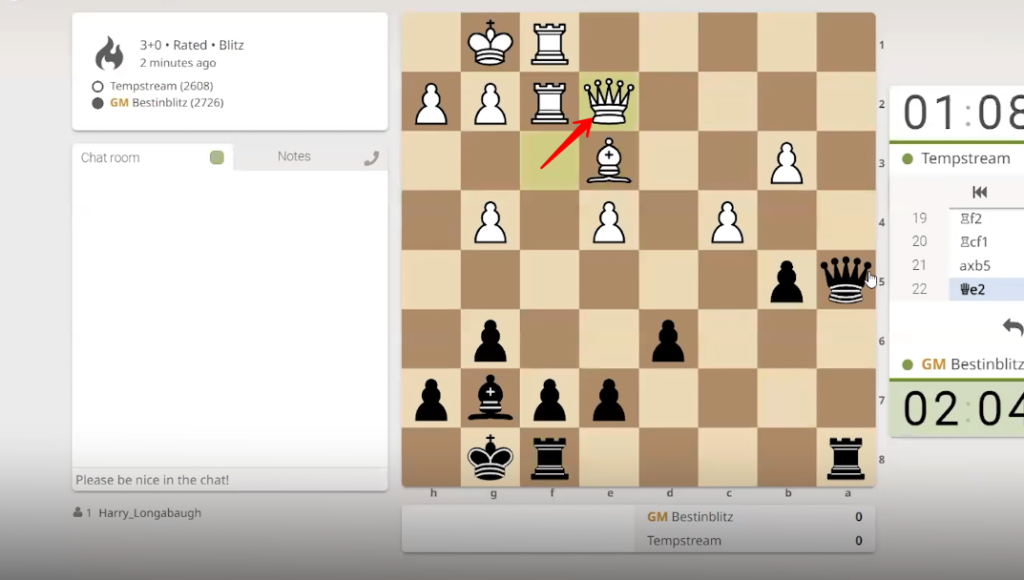
46. The black pawn is relocated diagonally from the “b5” to the “c4” square and captured by the by the white pawn.
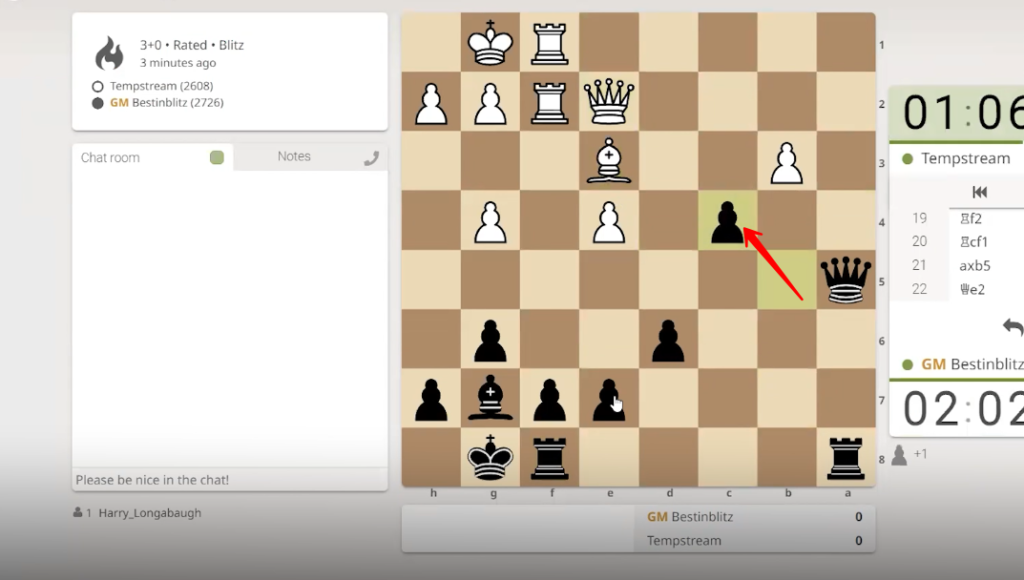
47. The white pawn is shifted diagonally from “b3” to “c4” square and captures the black pawn.
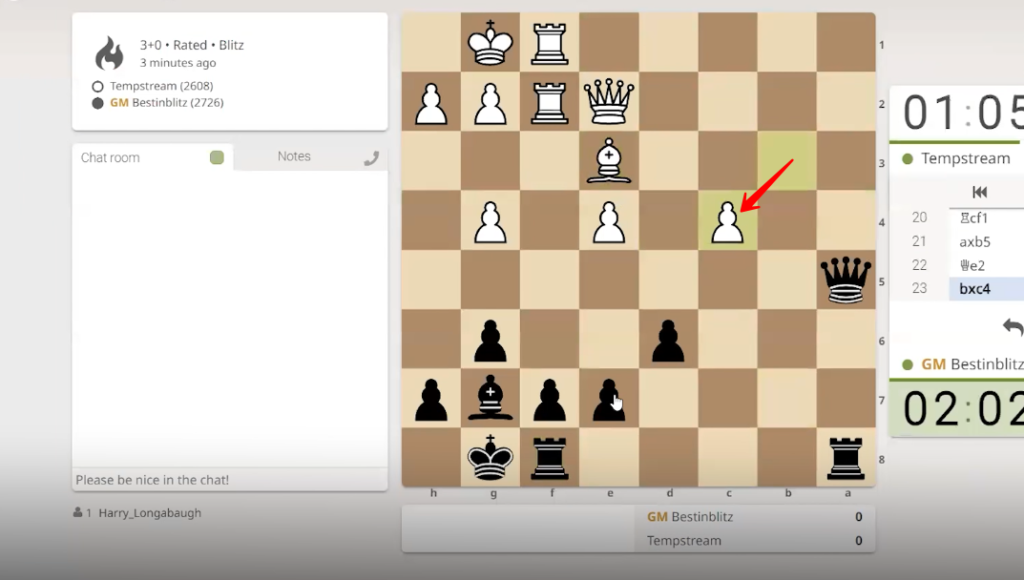
48. The black rook is repositioned from “a8” to “c8” square.
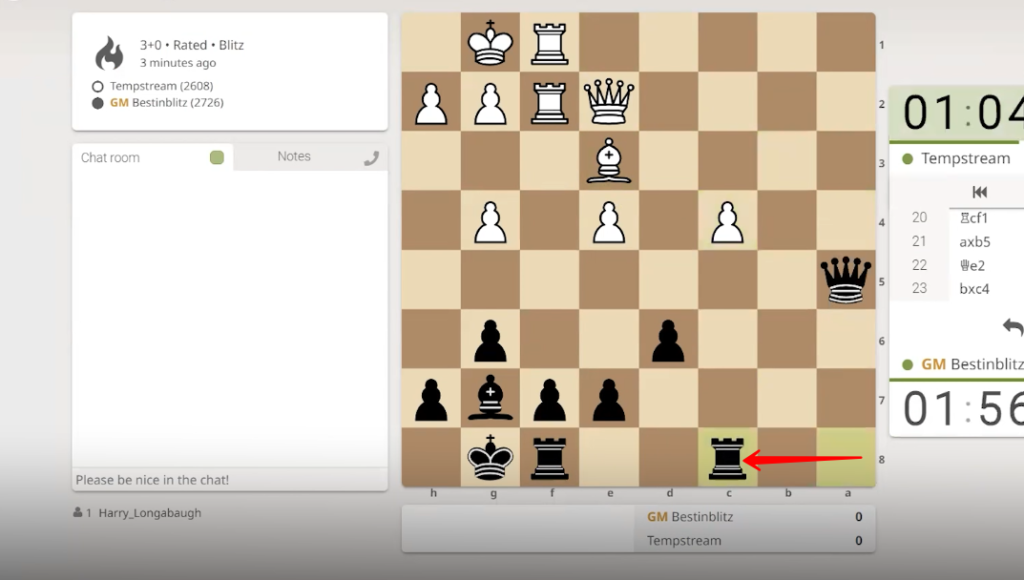
49. The white queen is shifted from “e2” to “d3” square.
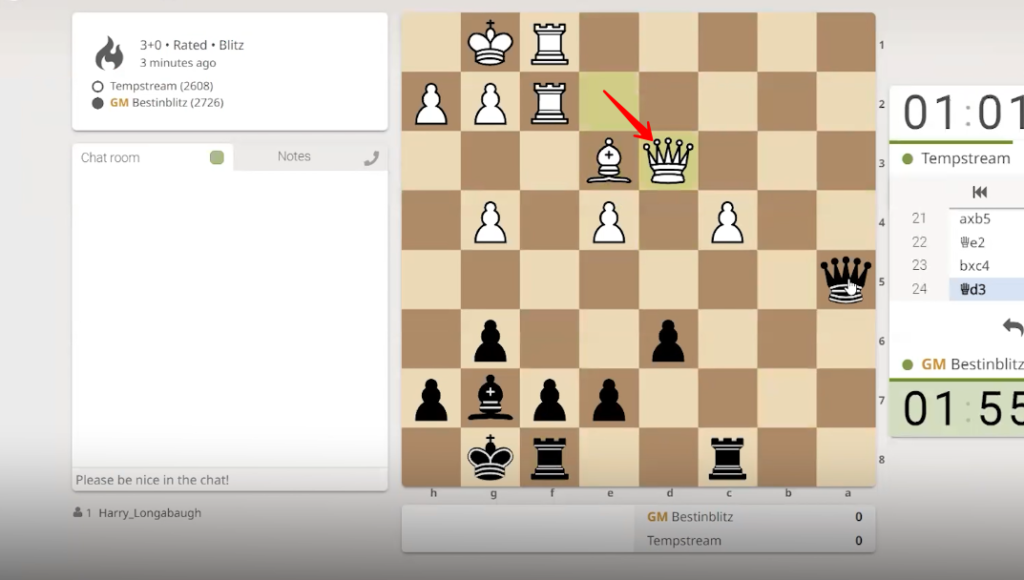
50. The black queen is moved from “a5” to “a6” square.
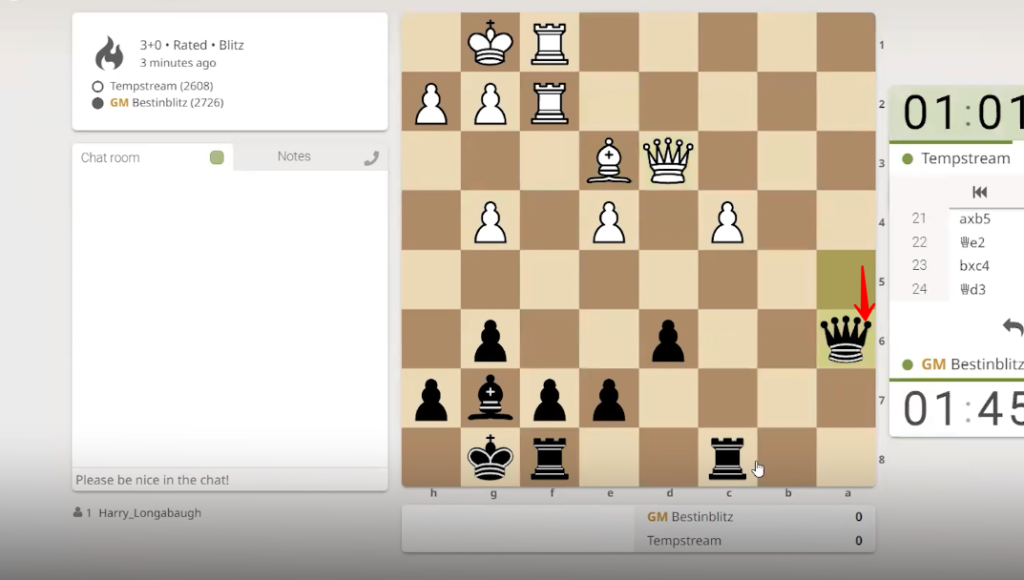
51. The white queen is transferred from “d3” to “d5” square.
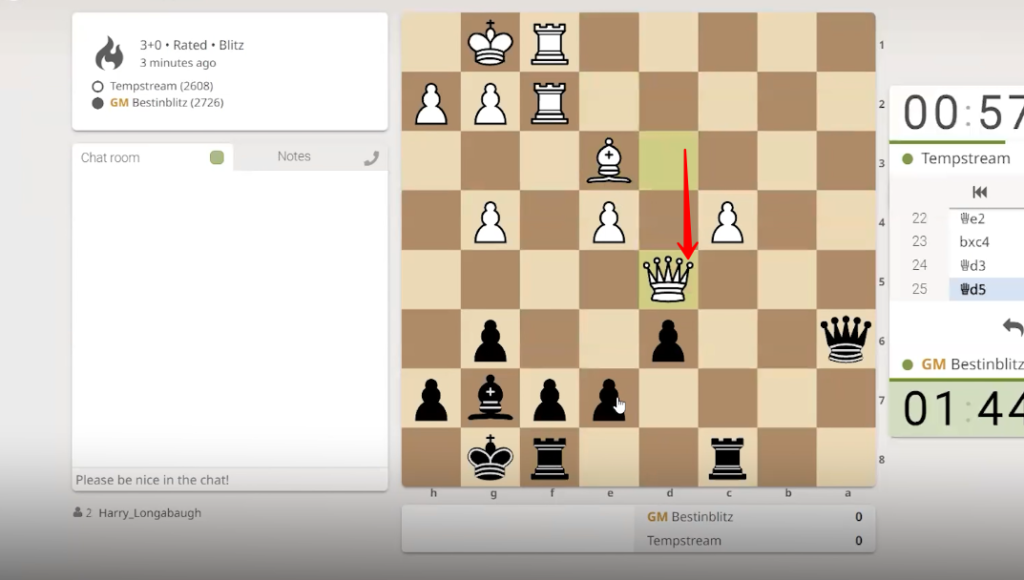
52. The black pawn is shifted from “e7” to “e6” square.
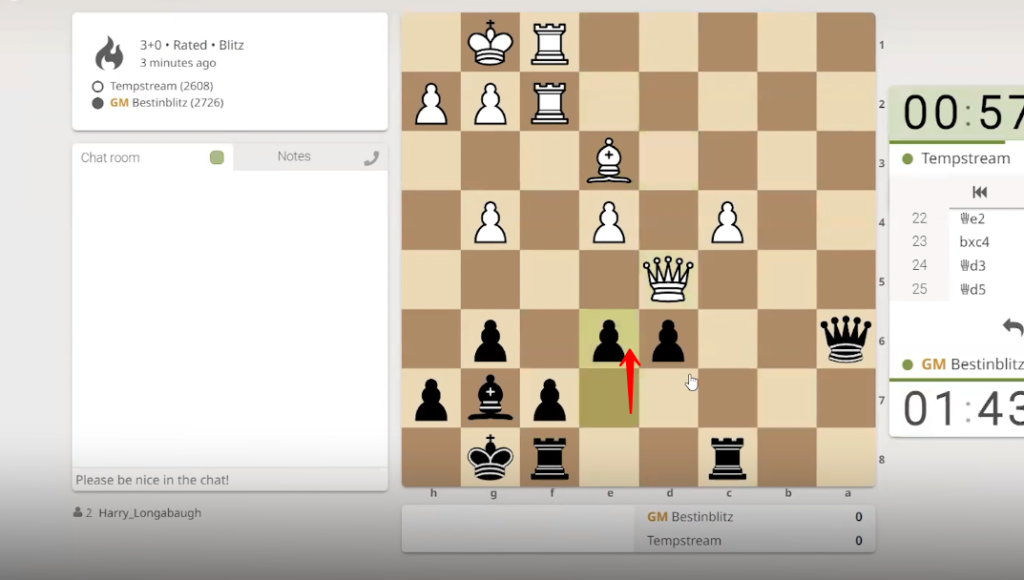
53. The white queen is relocated from “d5” to “d2” square.
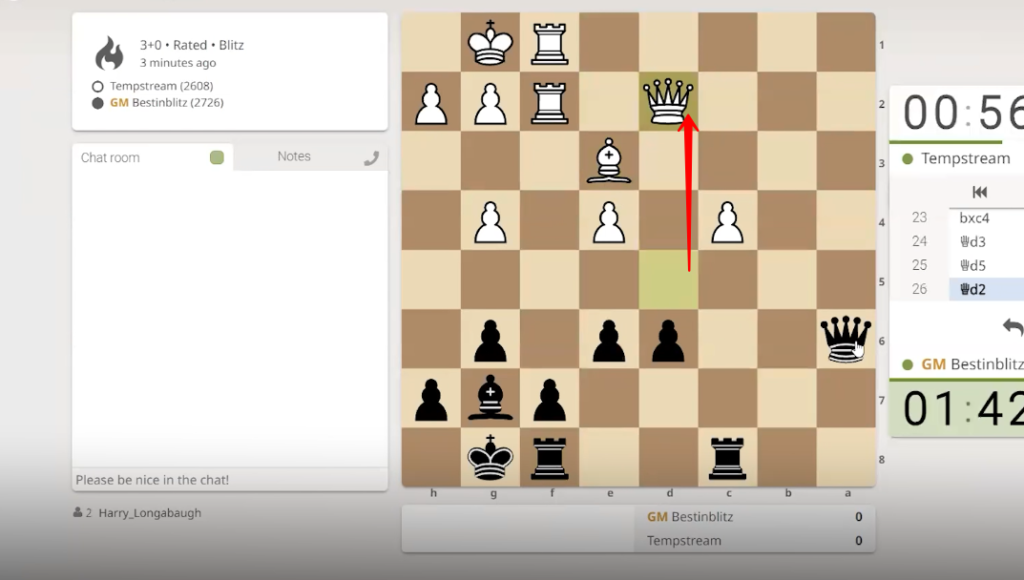
54. The black rook captured the white pawn by moving from “c8” to “c4” square.
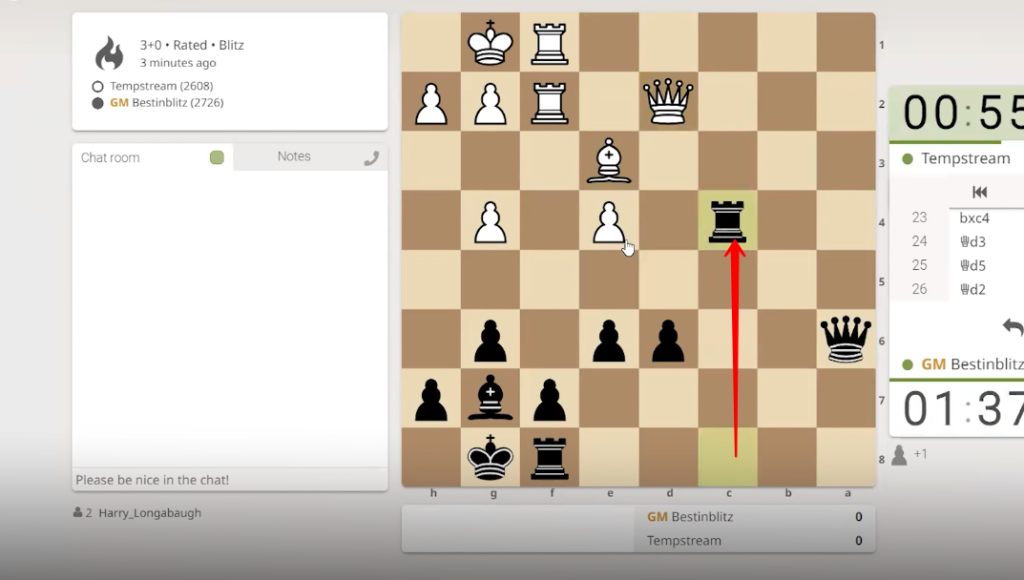
55. The white bishop is moved from “e3” to “h6” square.
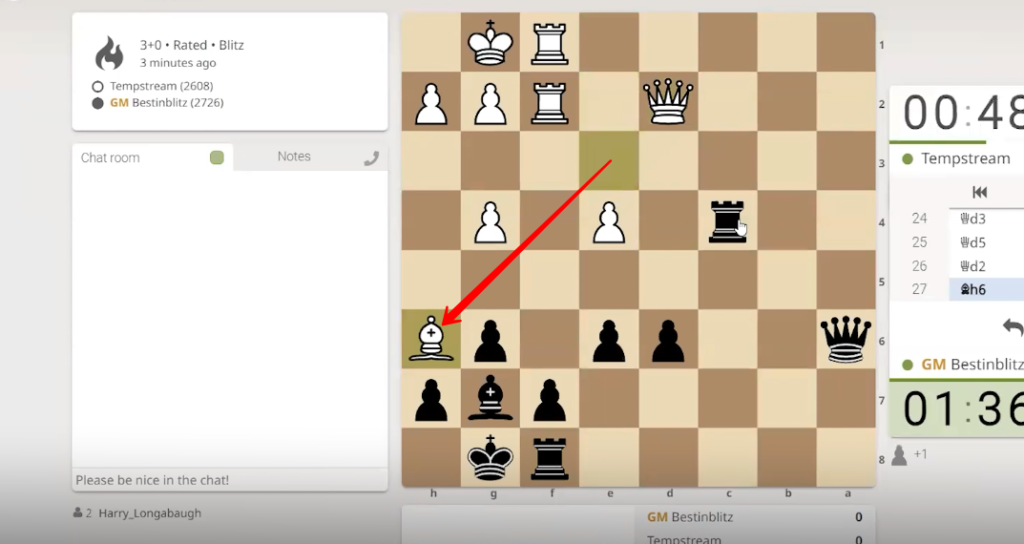
56. The black rook captured the white pawn by moving from “c4” to “e4” square.
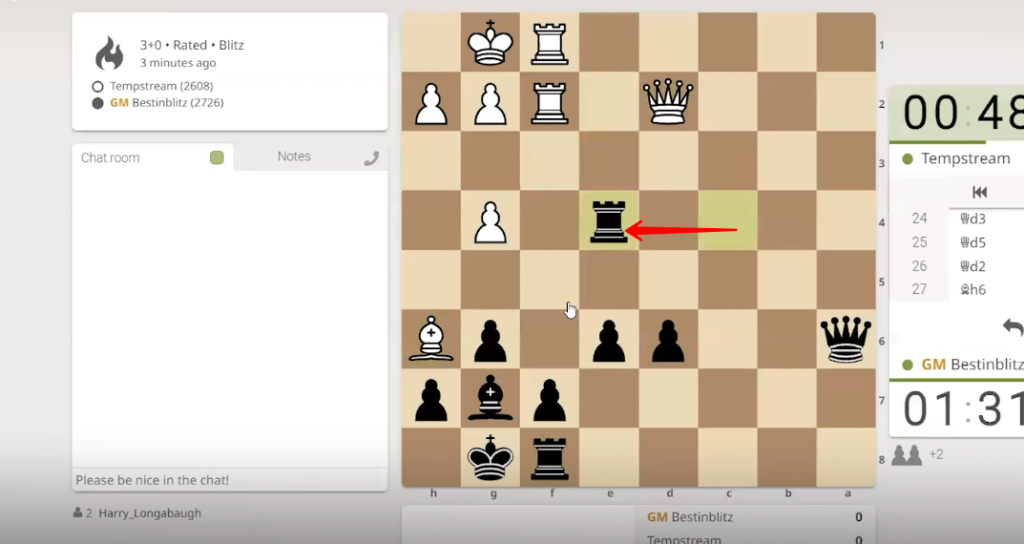
57. The white bishop moved diagonally from “h6” to “g7” square and captured black bishop.
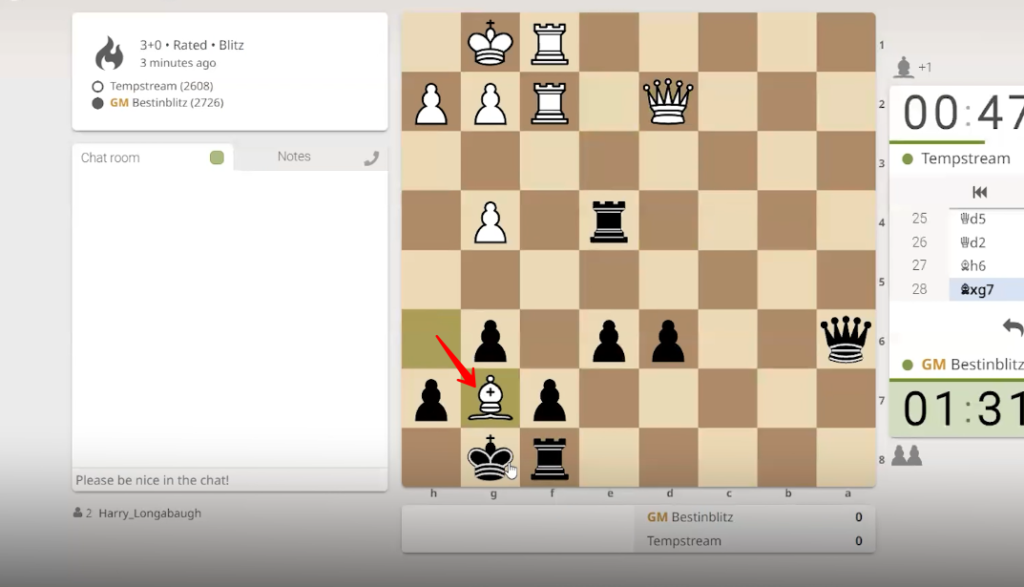
58. The black king moved forward from “g8” to “g7” square and captured the white bishop.
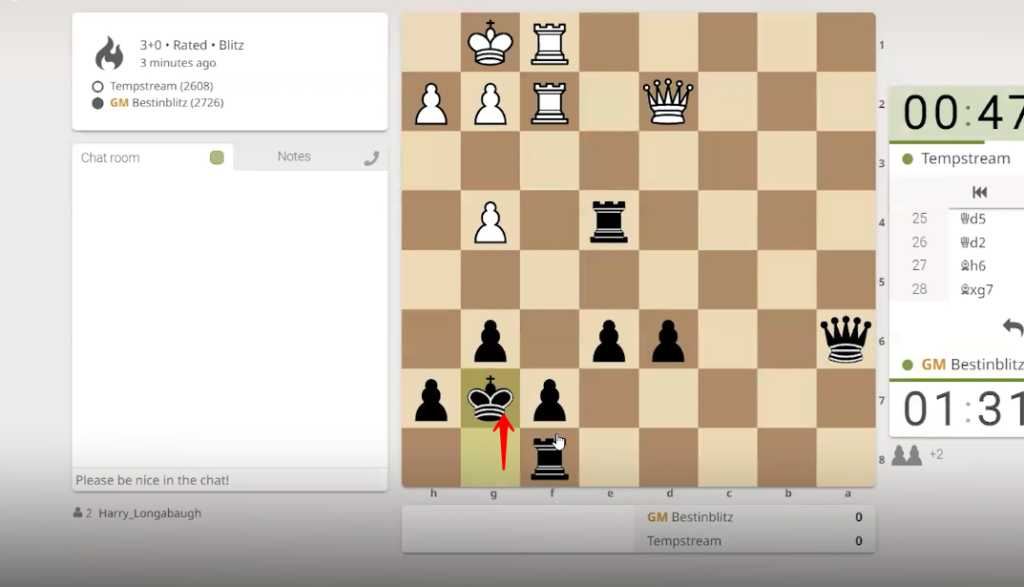
59. The white pawn is relocated from “g4” to “g5” square.
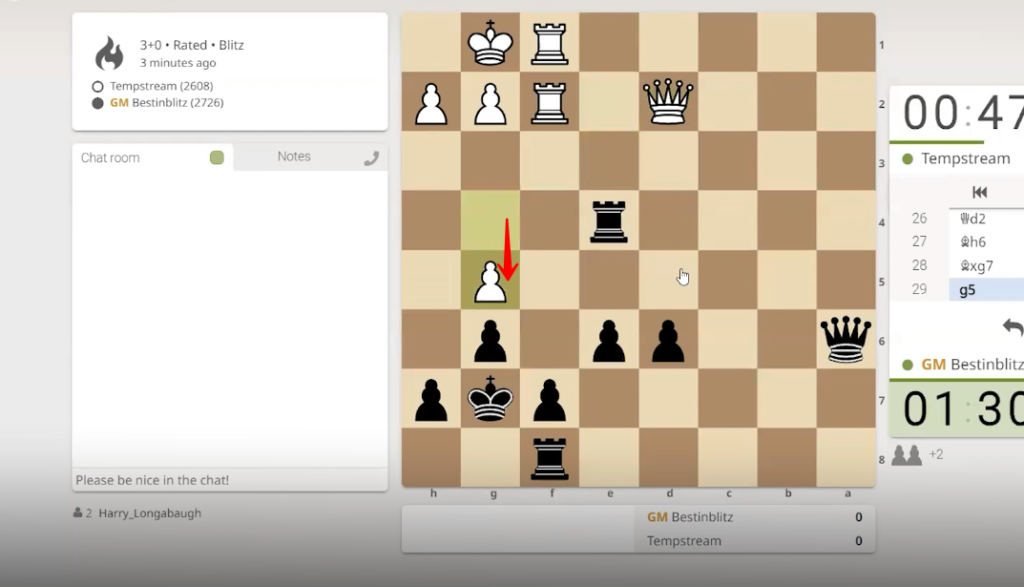
60. The black queen is shifted from “a6” to “b6” square.
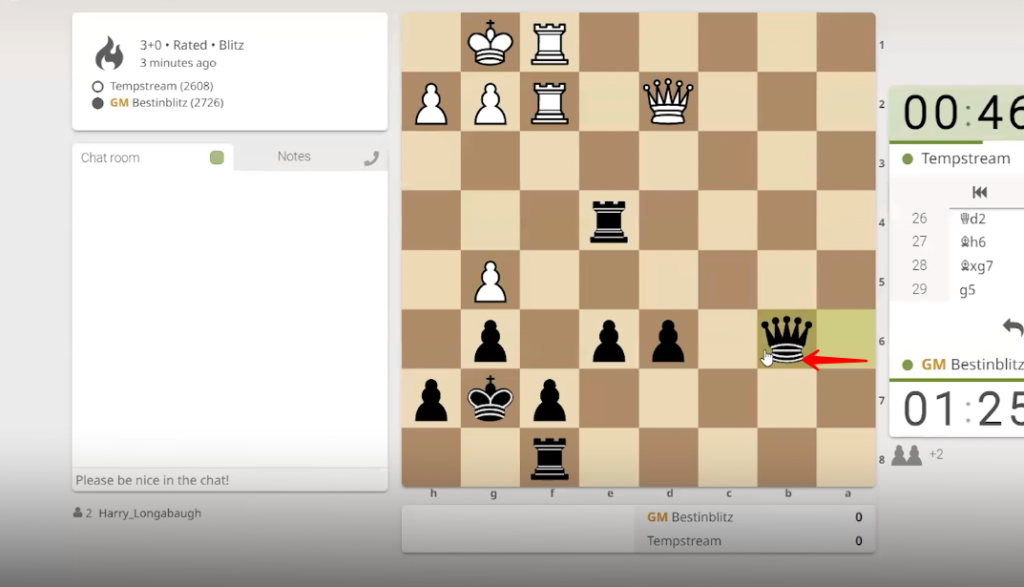
61. The white king moved from “g1” to “h1” square.
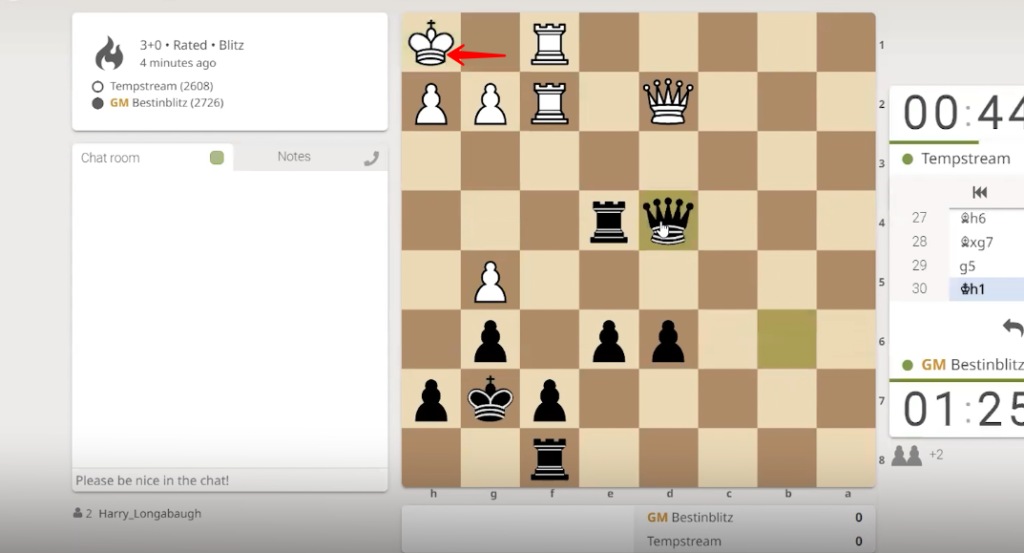
62. The black queen is shifted from “b6” to “d4” square.
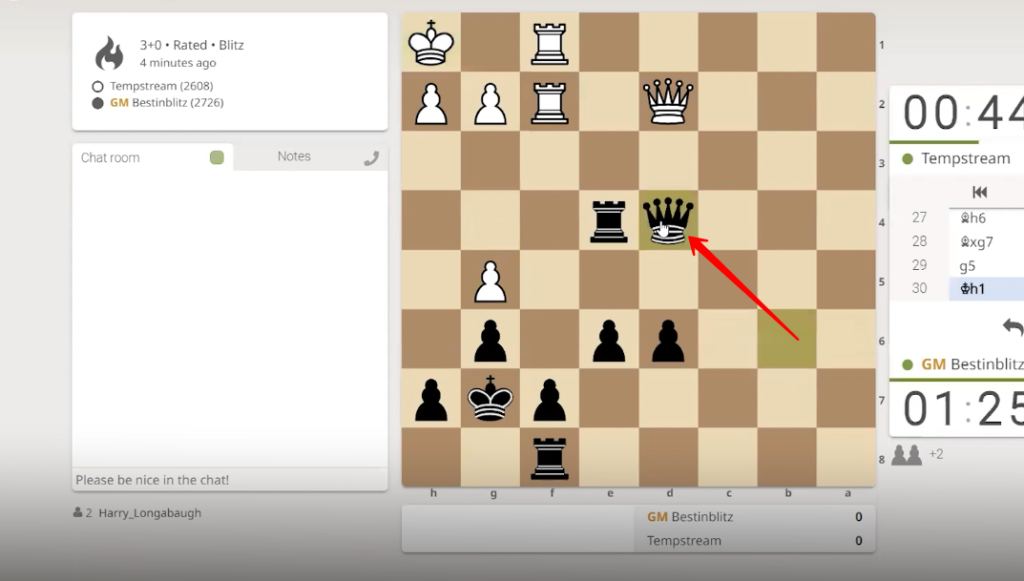
63. The white queen moved from “d2” to “c2” square.

64. The black rook moved from “e4” to “e5” square.
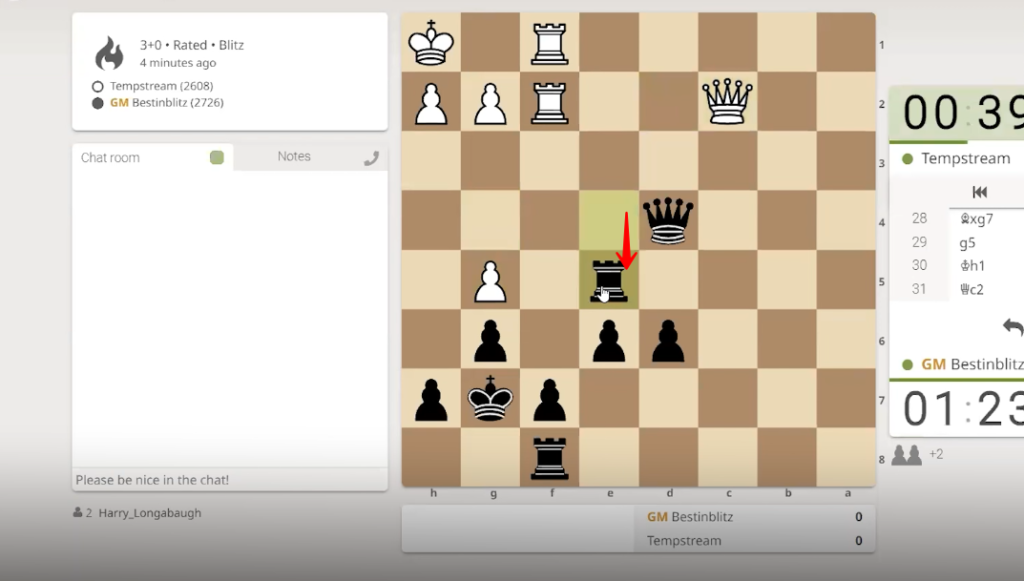
65. The white queen is shifted from “c2” to “c7” square.
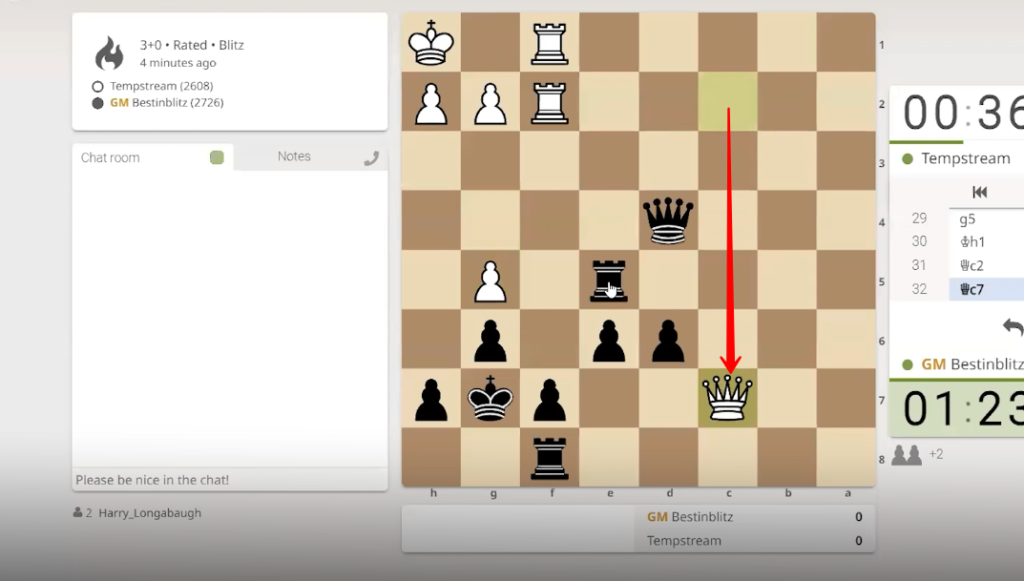
66. The black rook is repositioned from “e5” to “f5” square.
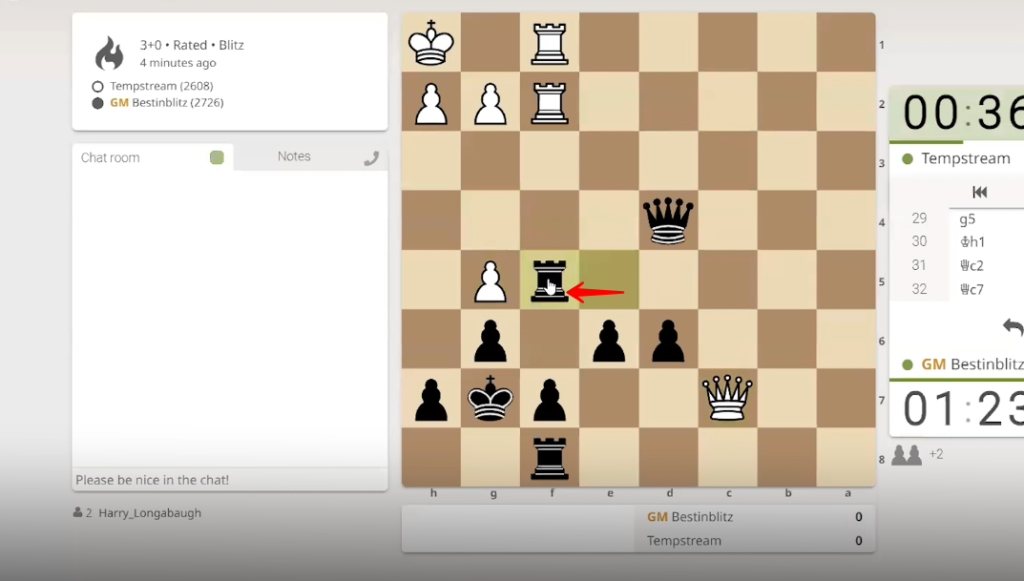
67. The white rook captured the black rook by moving from “f2” to “f5” square.
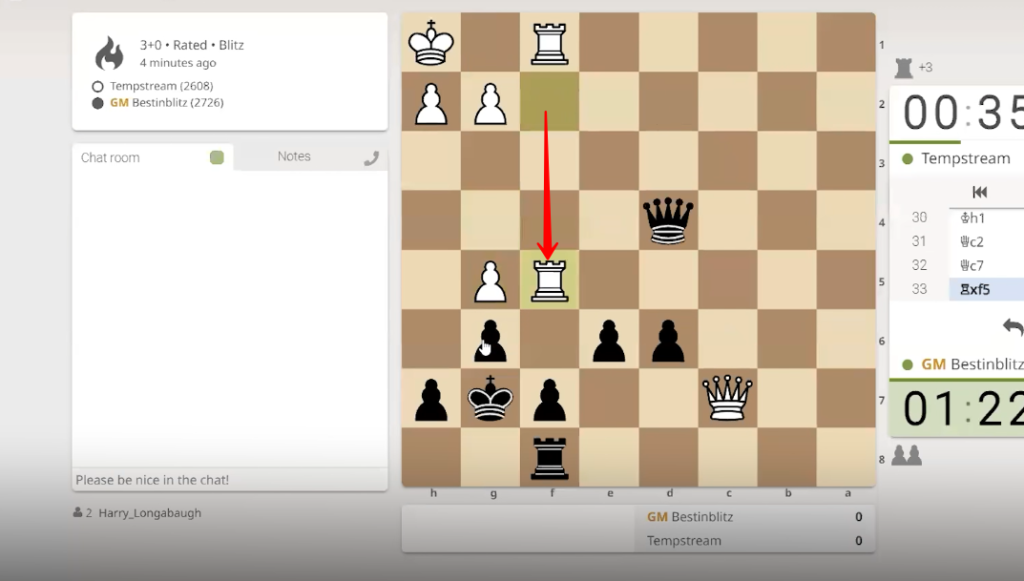
68. The black pawn captured the white rook by moving diagonally from “g6” to “f5” square.

69. The white queen is shifted from “c7” to “e7” square.
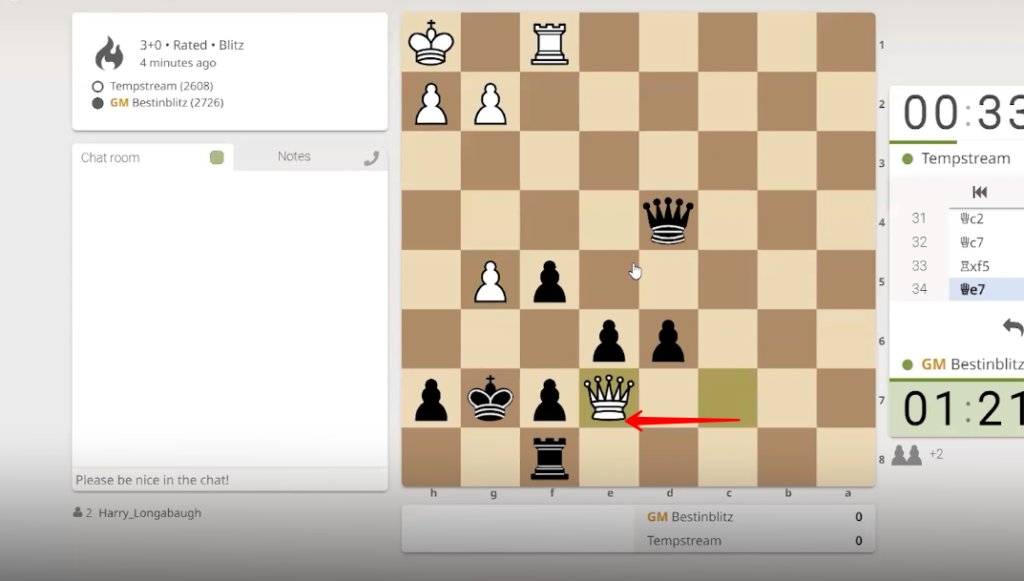
70. The black pawn moved forward from “d6” to “d5” sqaure.
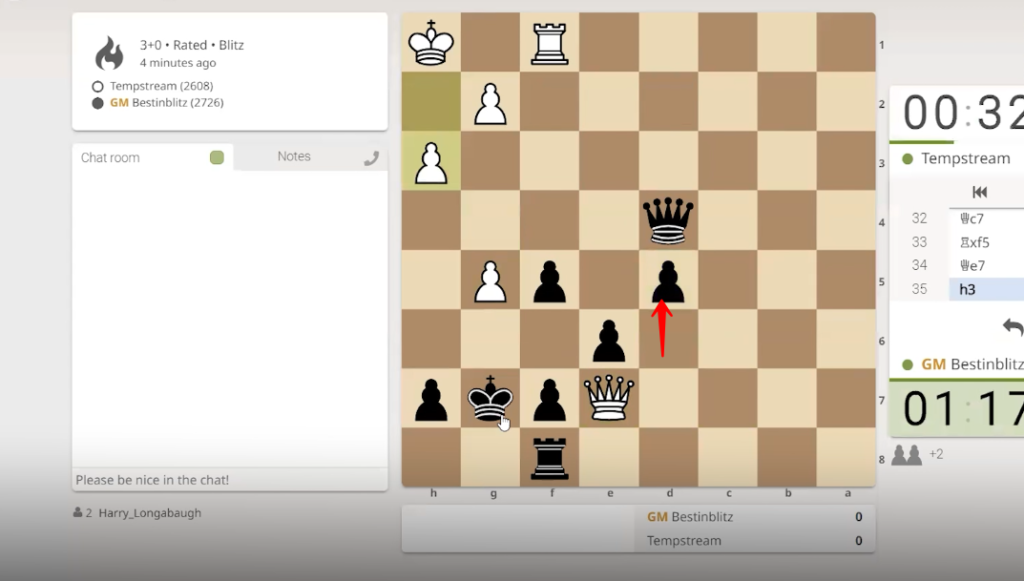
71. The white pawn moved from “h2” to “h3” square.

72. The black rook is shifted from “f8” to “a8” square.

73. The white king moved from “h1” to “h2” square.
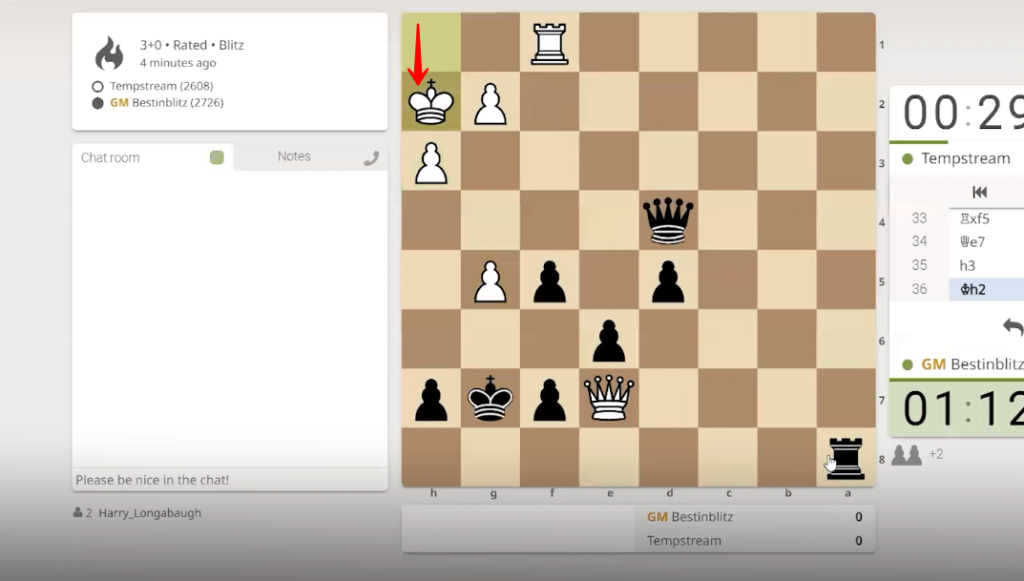
74. The black queen is repositioned diagonally from “d4” to “e5” square. Now, the white king is in danger because it can be captured by black queen. (Note: The main goal in chess is to checkmate your opponent’s king.) This means putting the opponent’s king under direct attack with no legal move available to escape capture.
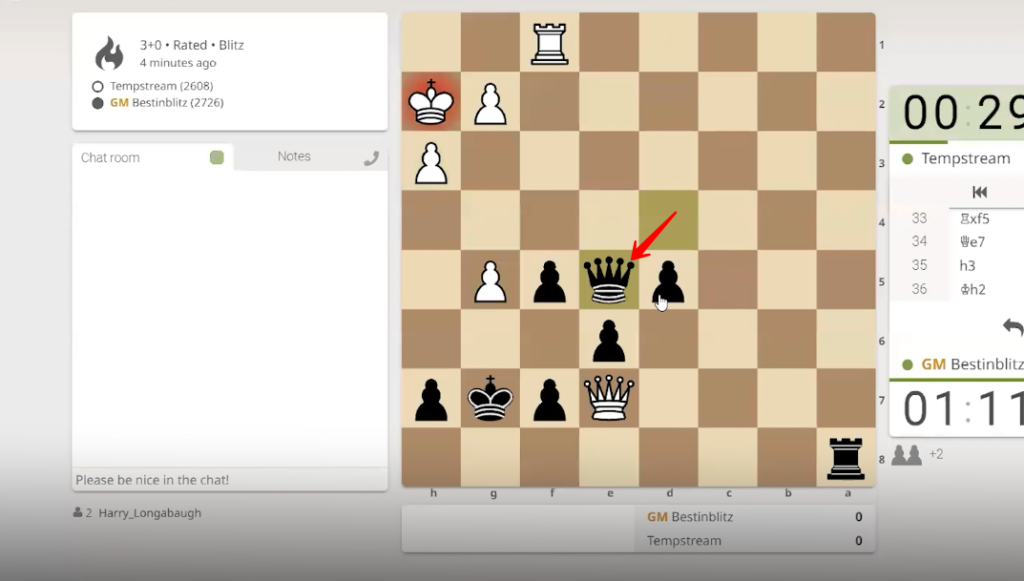
75. The white king stepped back and moved from “h2” to “h1” square.

76. The black king moved forward from “g7” to “g6” square.
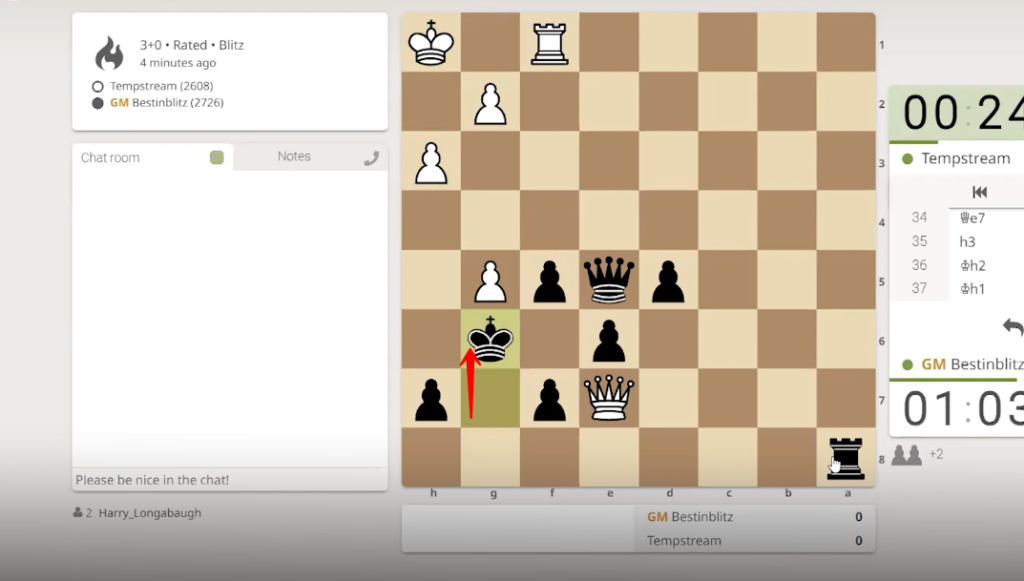
77. The white pawn moved from “h3” to “h4” square.
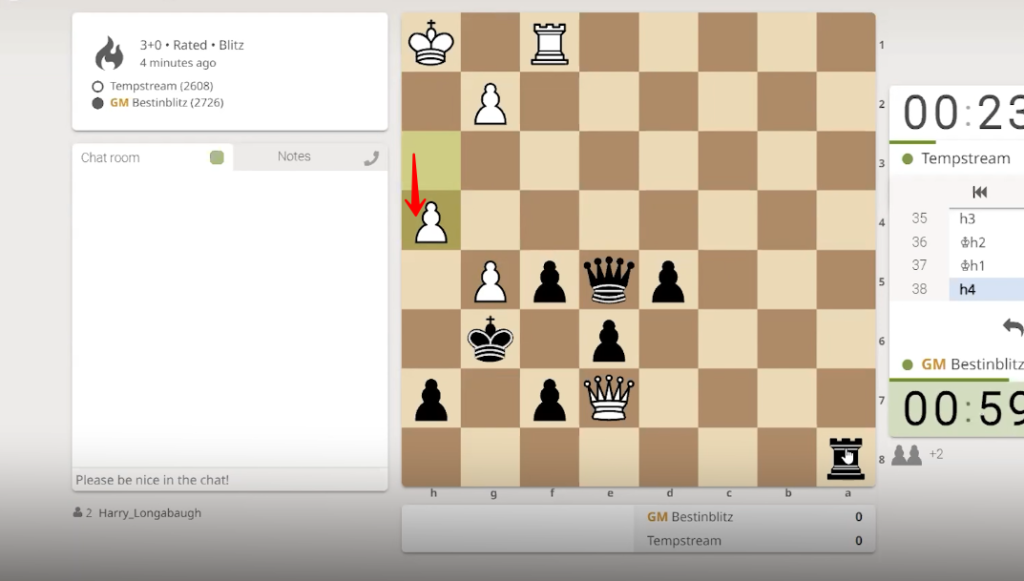
78. The black pawn is relocated from “d5” to “d4” square.
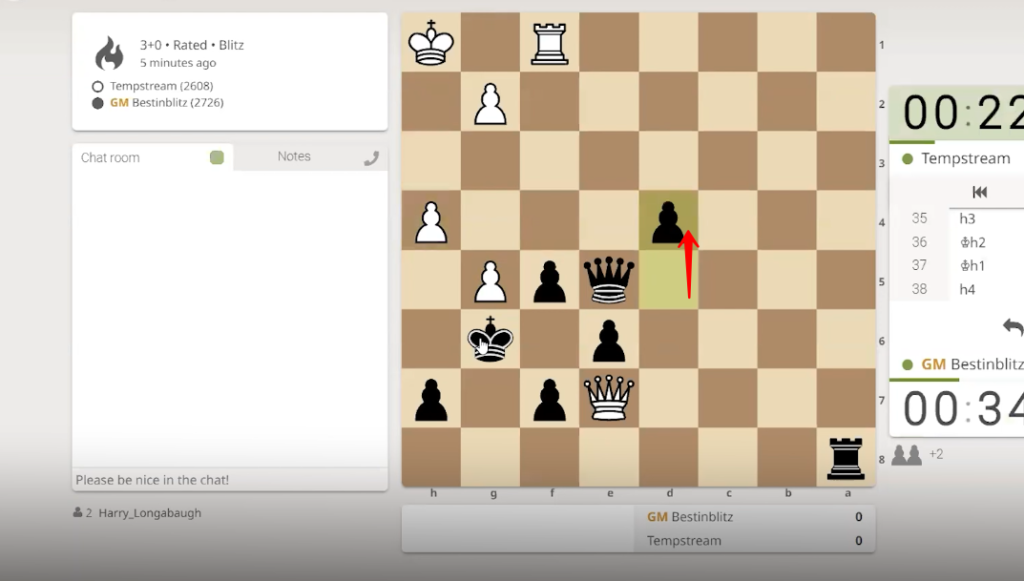
79. The white pawn moved one step forward from “h4” to “h5” square.
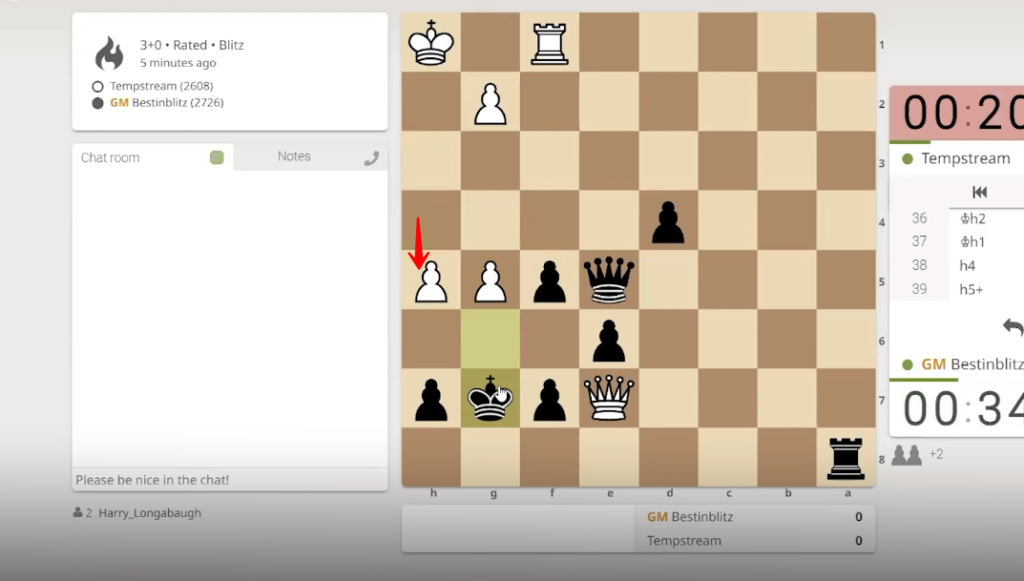
80. The black king is repositioned from “g6” to “g7” square.

81. The white rook is shifted from “f1” to “b1” square.
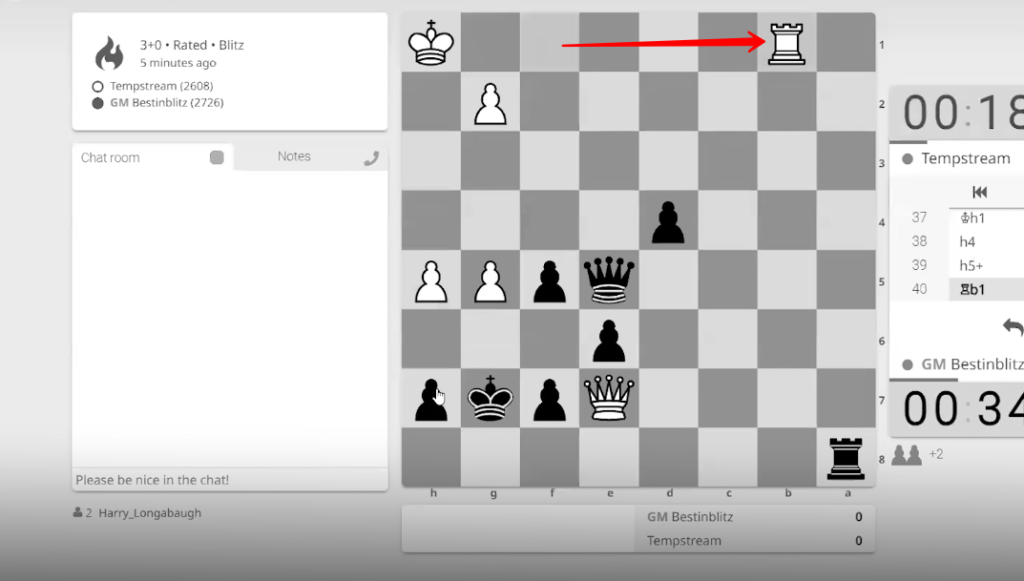
82. The black pawn moved from “d4” to “d3” square.
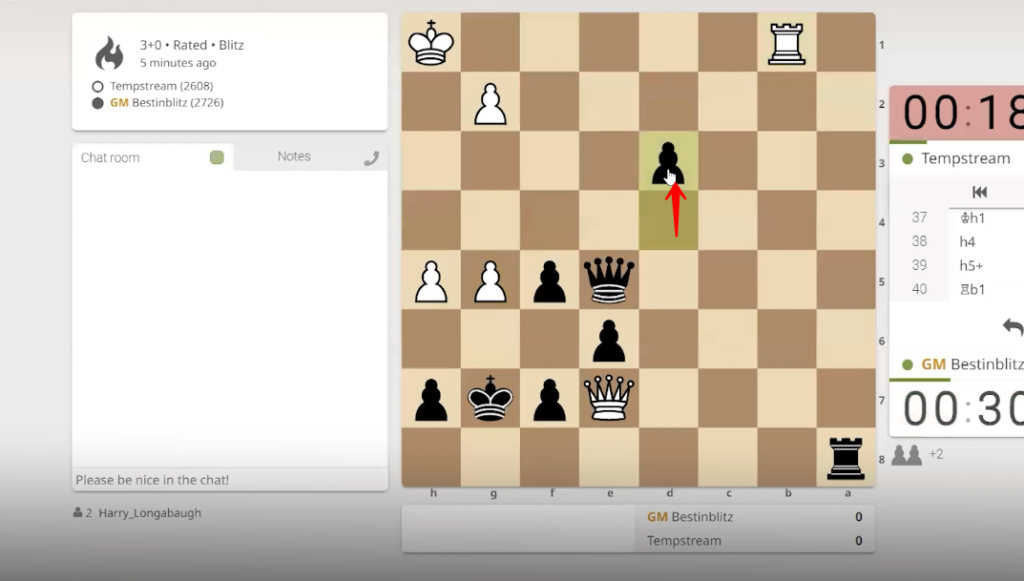
83. The white rook is relocated from “b1” to “d1” square.
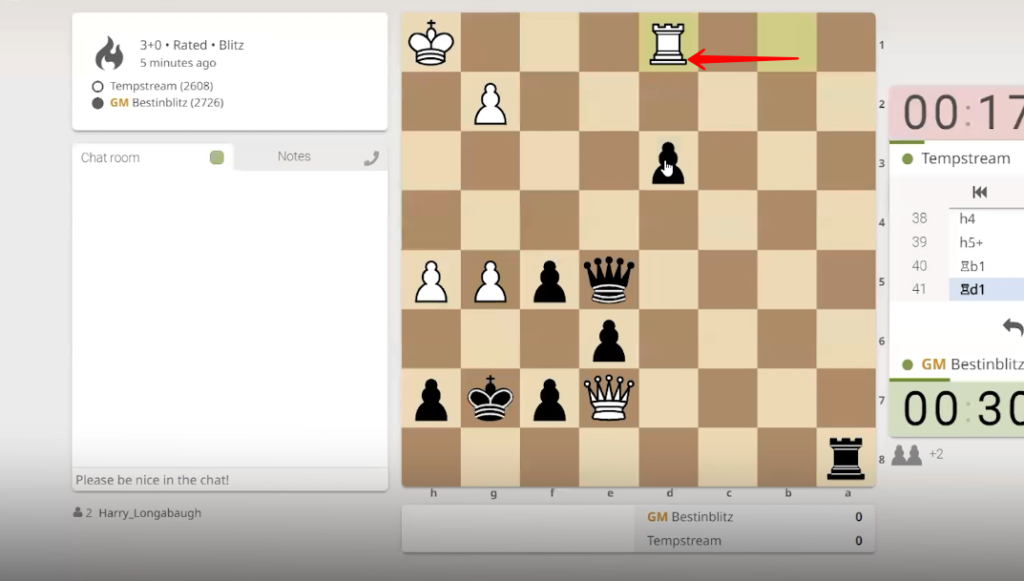
84. The black pawn is shifted from the “d3” to the “d2” square.
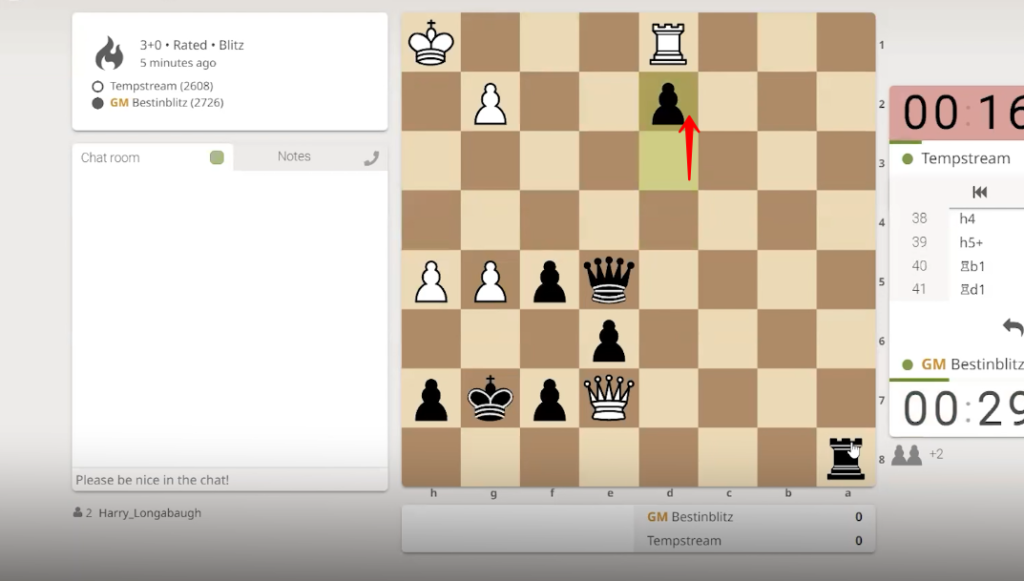
85. The white queen is repositioned from “e7” to “d7” square.
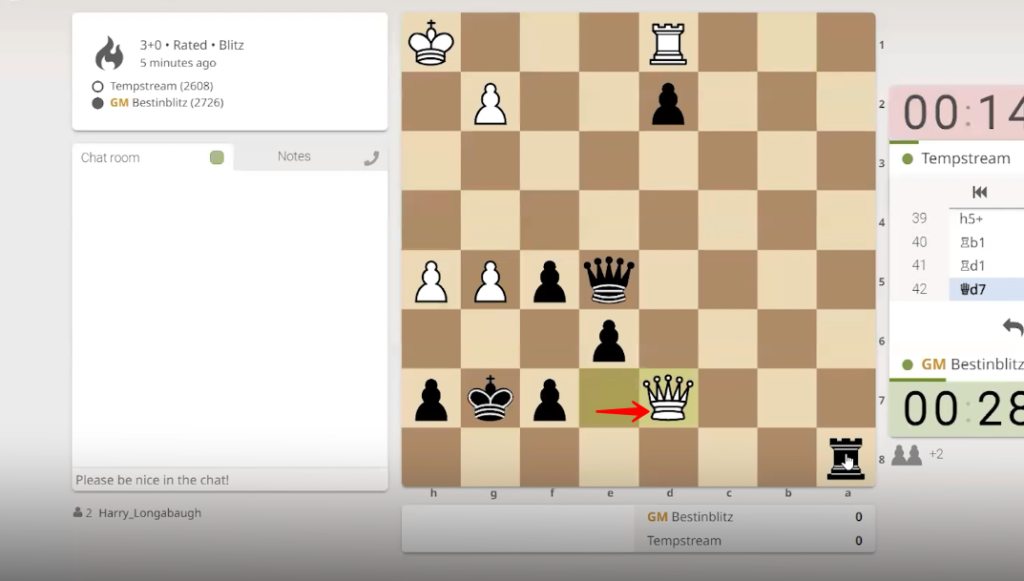
86. The black queen is relocated from “e5” to “e2” square.
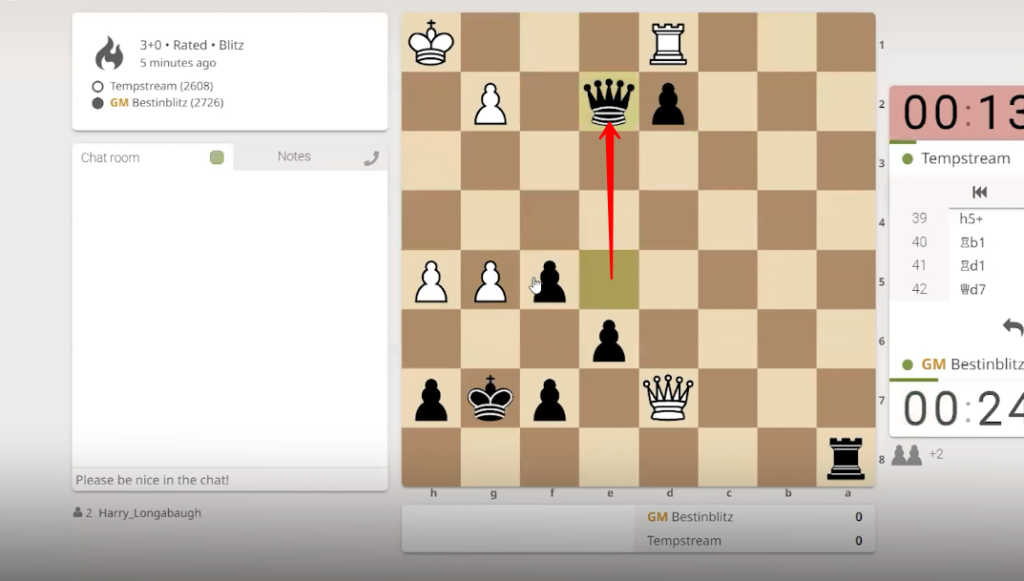
87. The white queen captured the black pawn by moving from “d7” to “d2” square.
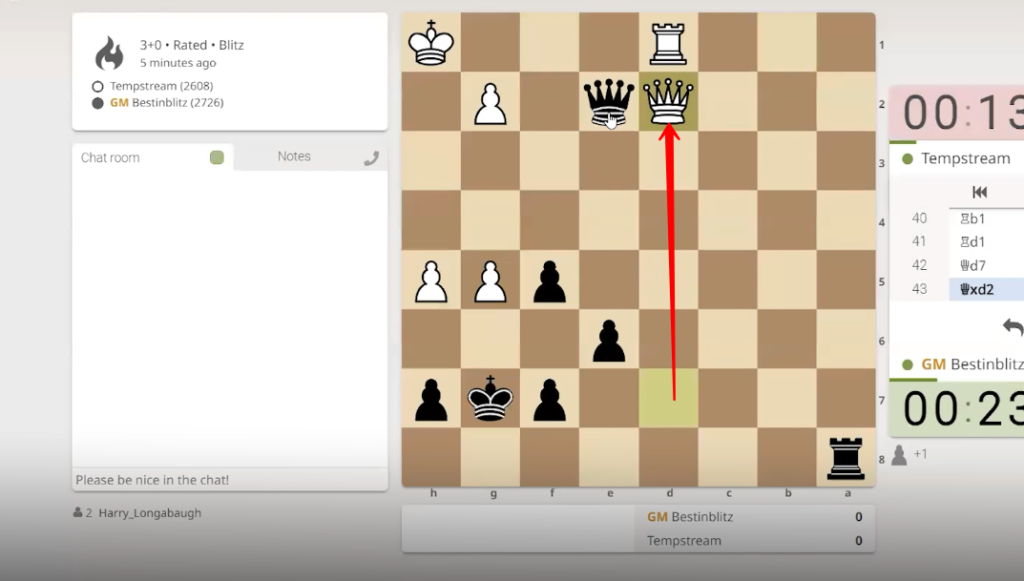
88. The black queen captured the white pawn by moving from “e2” to “h5” square. The white king is in danger now because he can be captured by the black queen.
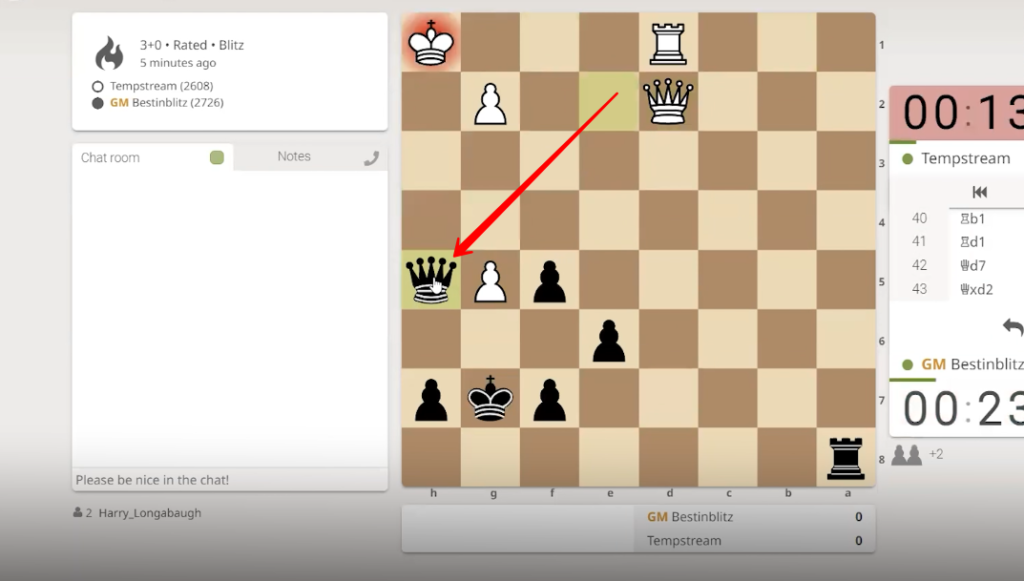
89. The white king is shifted from “h1” to “g1” square.

90. The black queen is repositioned from “h5” to “g4” square.
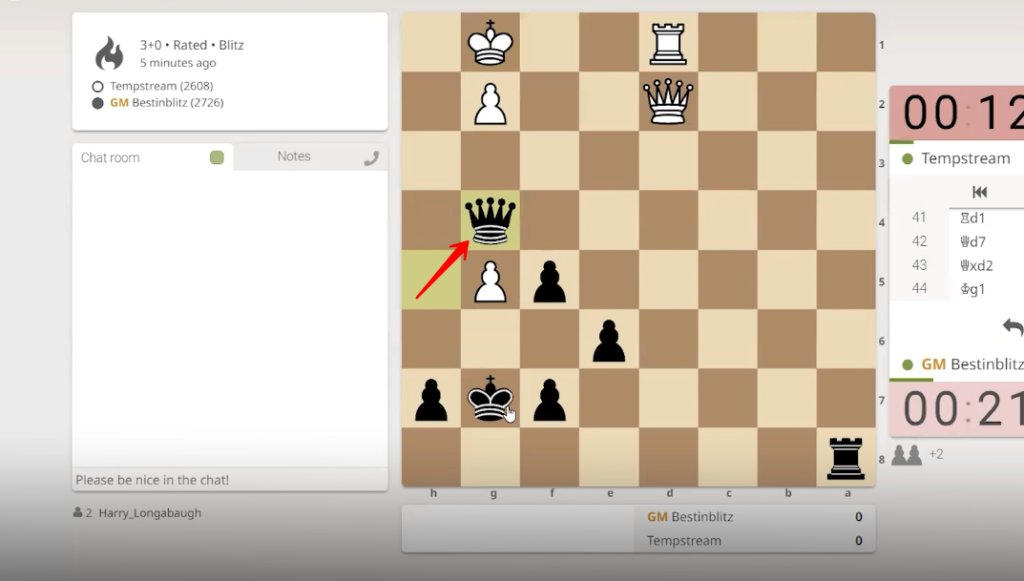
91. The white queen moved from “d2” to “c3” square and can easily capture the black king.
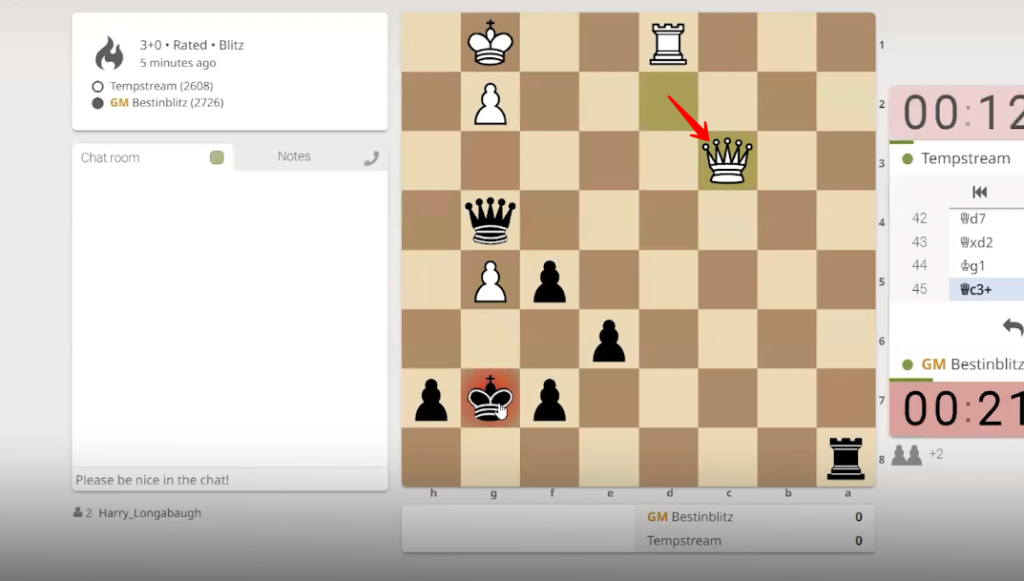
92. The black king stepped back from “g7” to “g8” square.
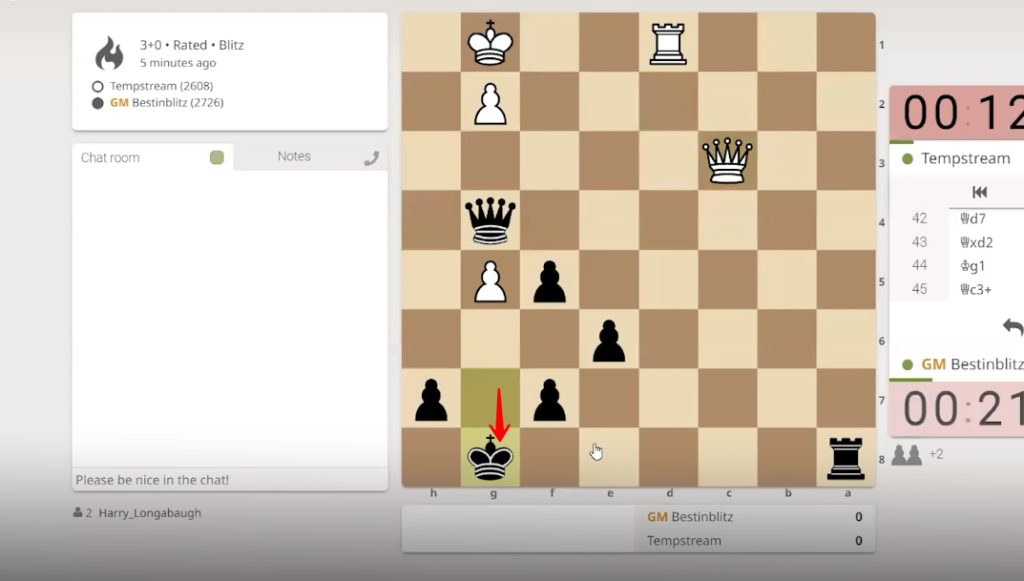
93. The white queen moved from “c3” to “d2” square.
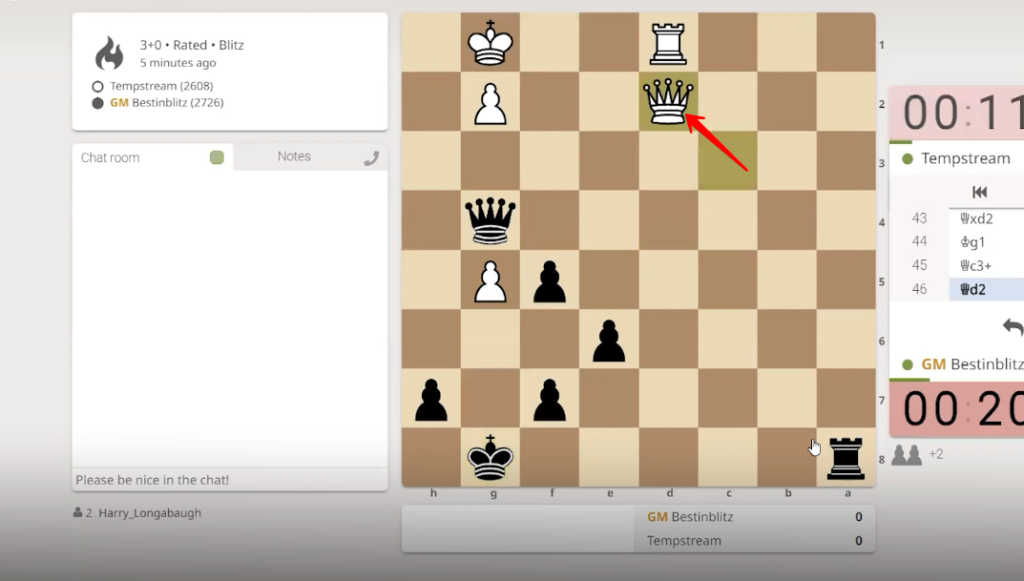
94. The black rook is shifted from “a8” to “e8” square.
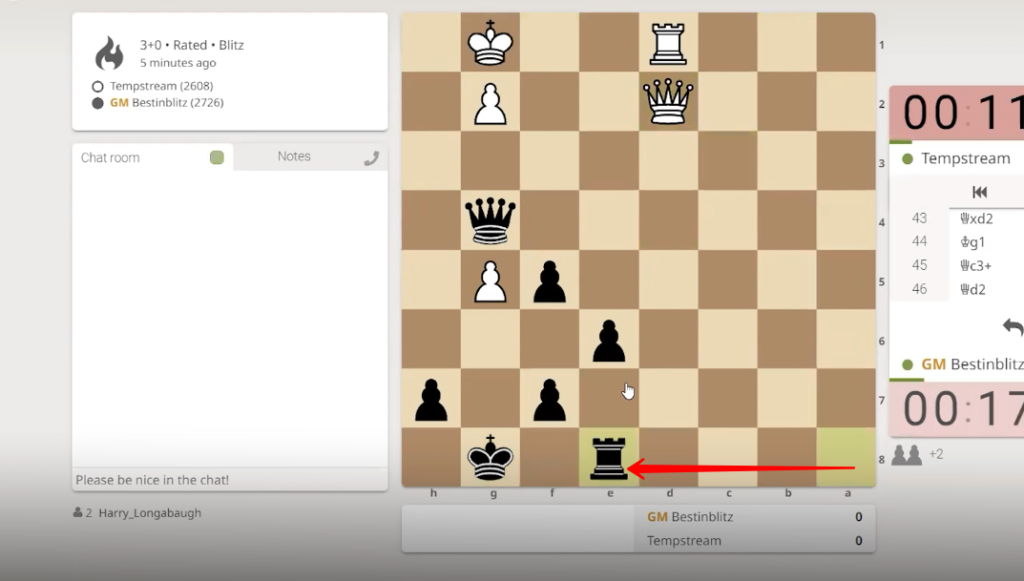
95. The white rook is relocated from “d1” to “e1” square.
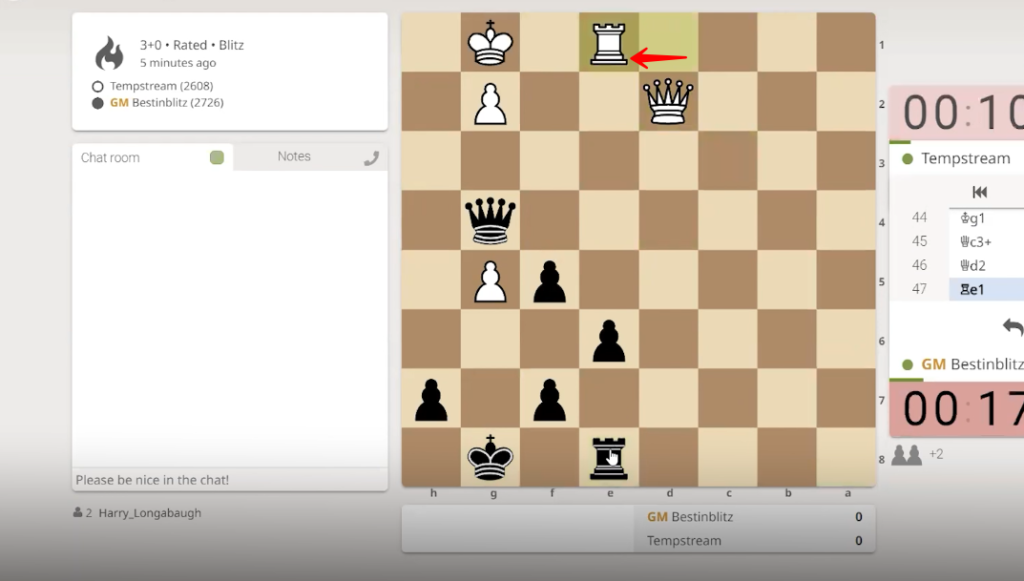
96. The black pawn is displaced from “e6” to “e5” square.
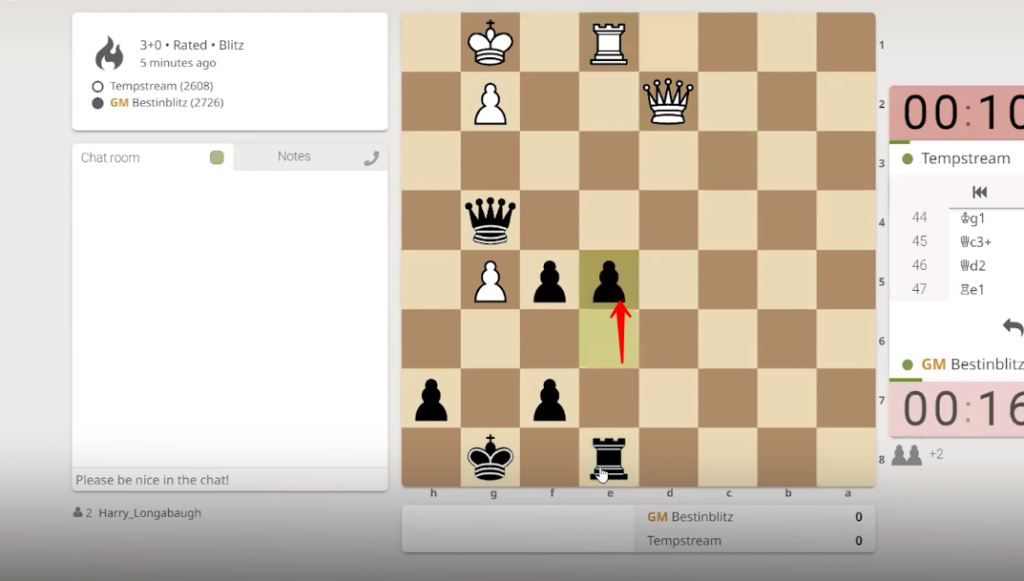
97. The white queen is transferred from “d2” to “d7” square.
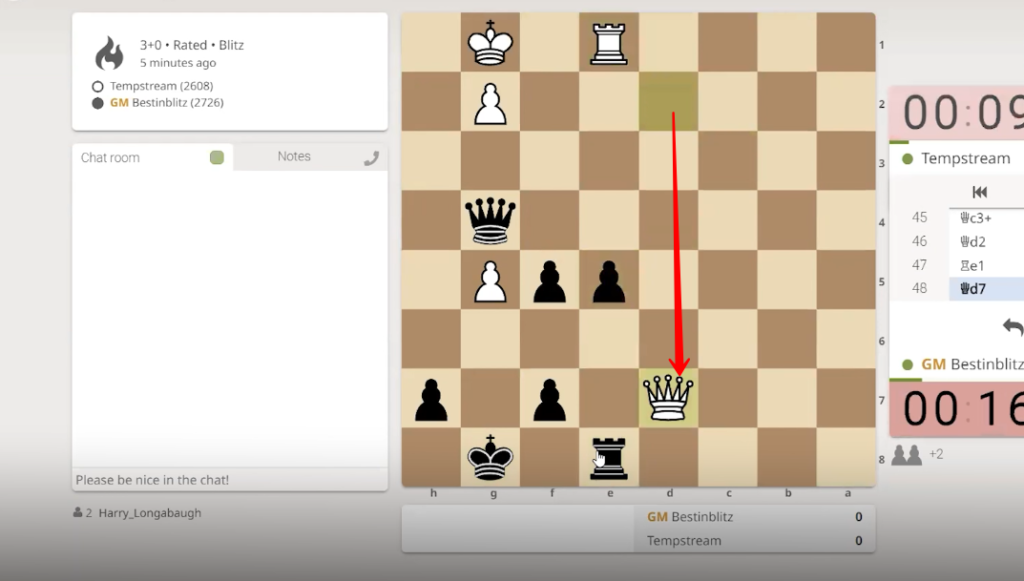
98. The black rook is relocated from “e8” to “e6” square.
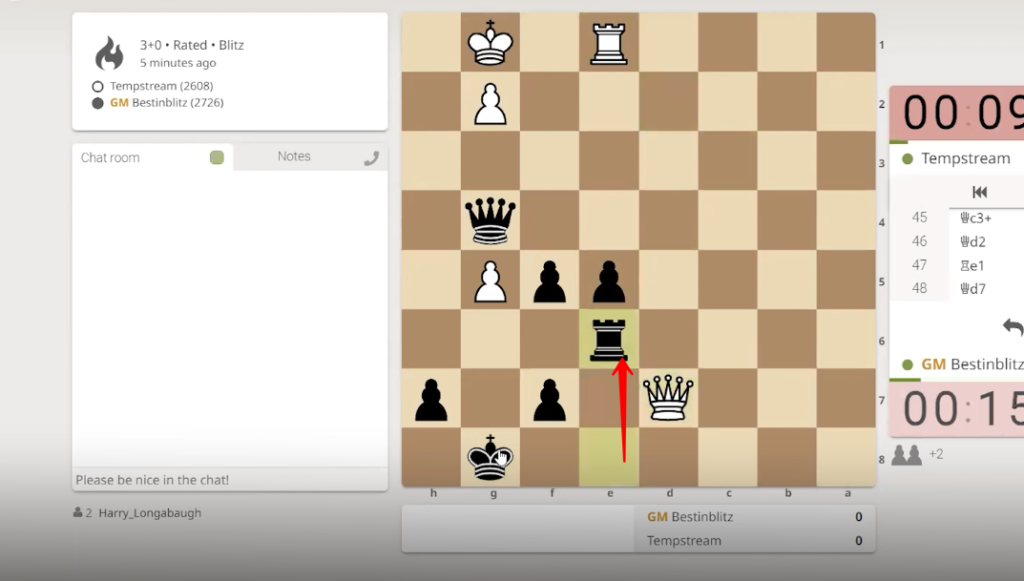
99. The white queen is shifted from “d7” to “d8” square.

100. The black king is relocated from “g8” to “g7” square.
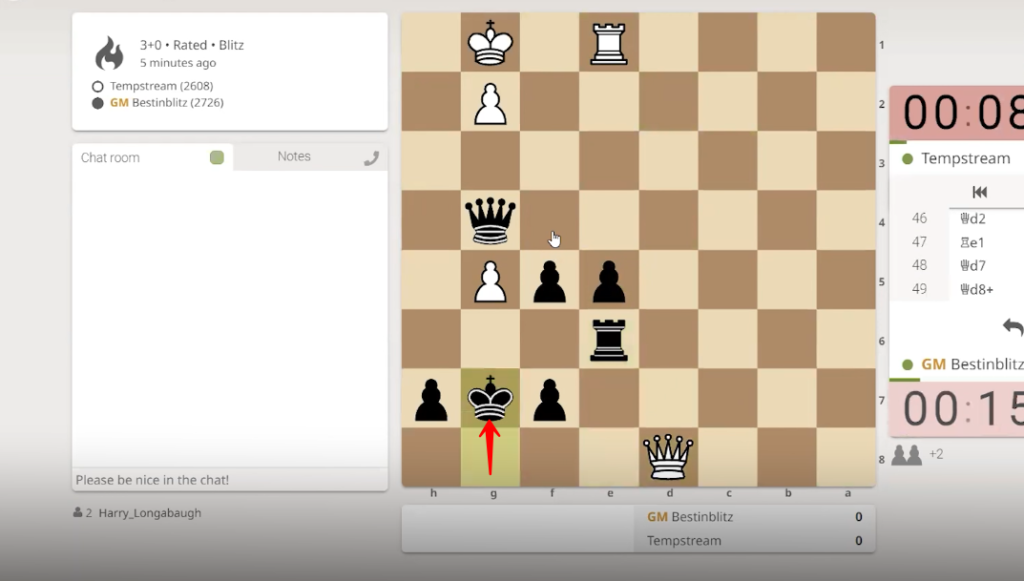
101. The white rook is repositioned from “e1” to “d1” square.
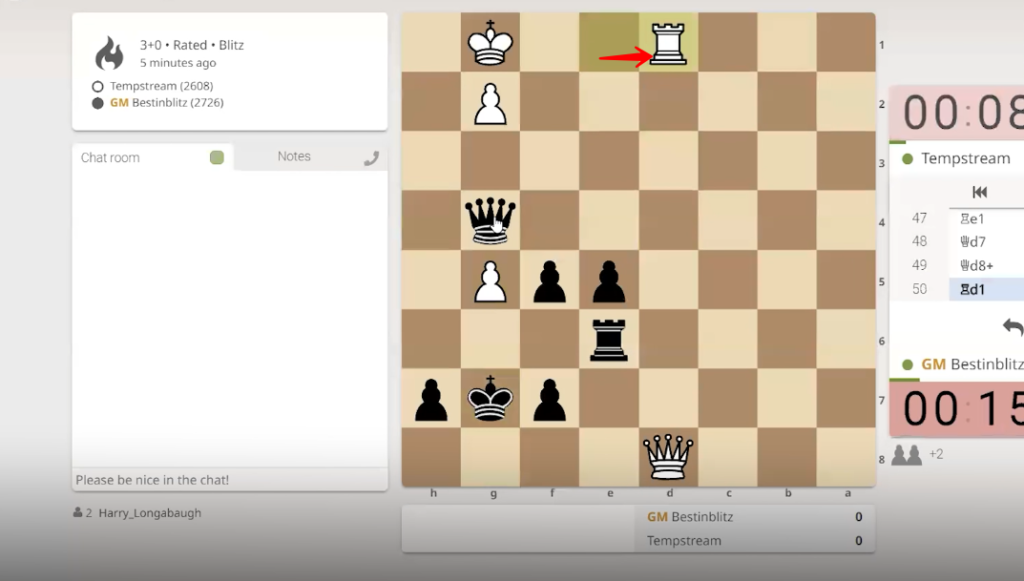
102. The black pawn is shifted from “f5” to “f4” square.
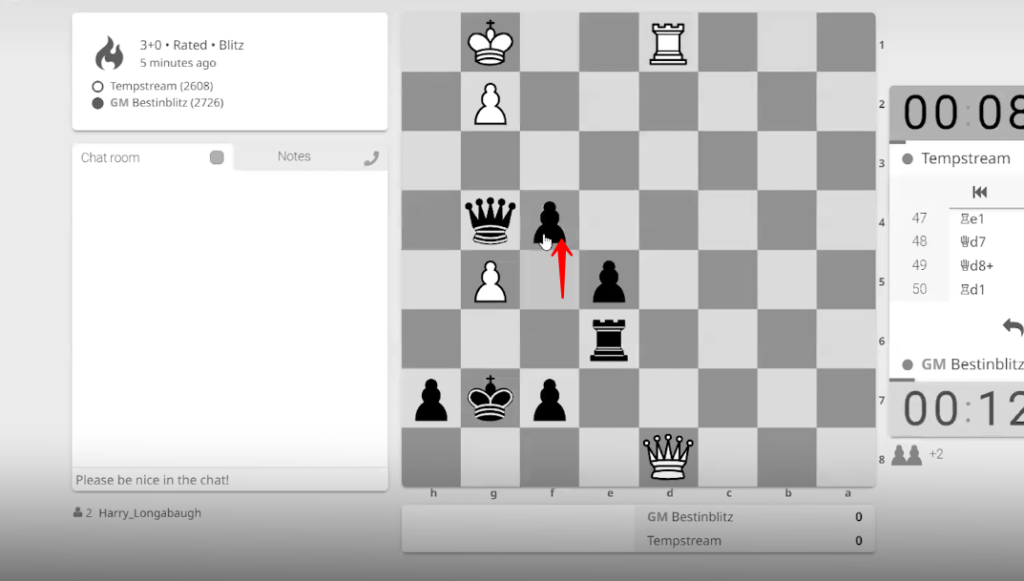
103. The white rook is repositioned from “d1” to “d7” square.
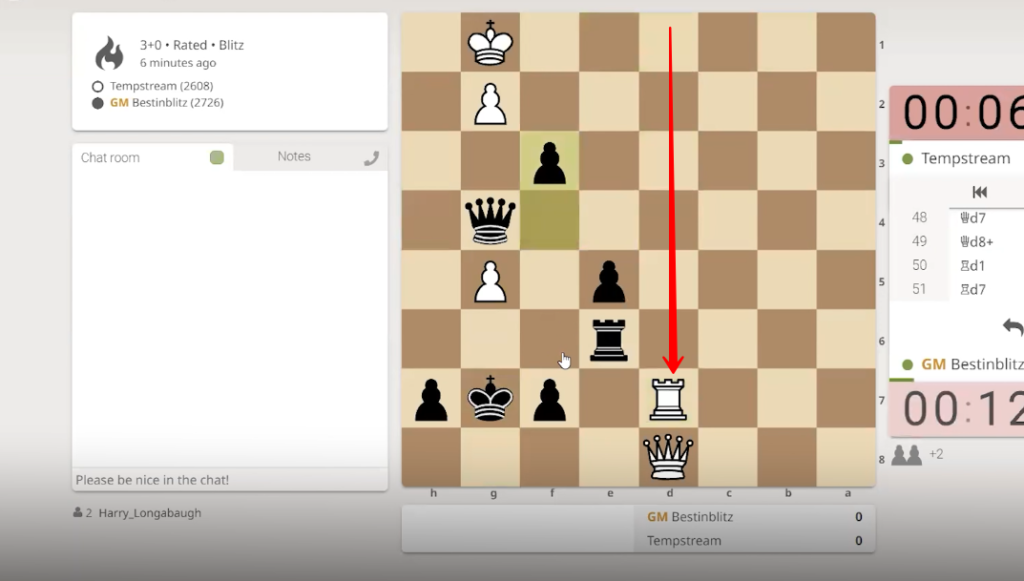
104. The black pawn moved from “f4” to “f3” square.
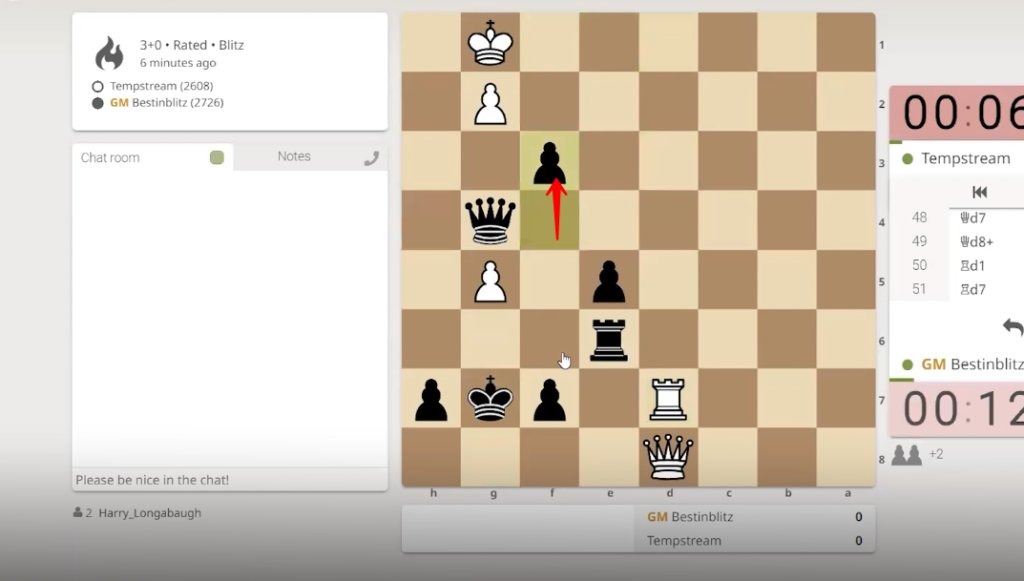
105. The white rook moved from “d7” to “d2” square.
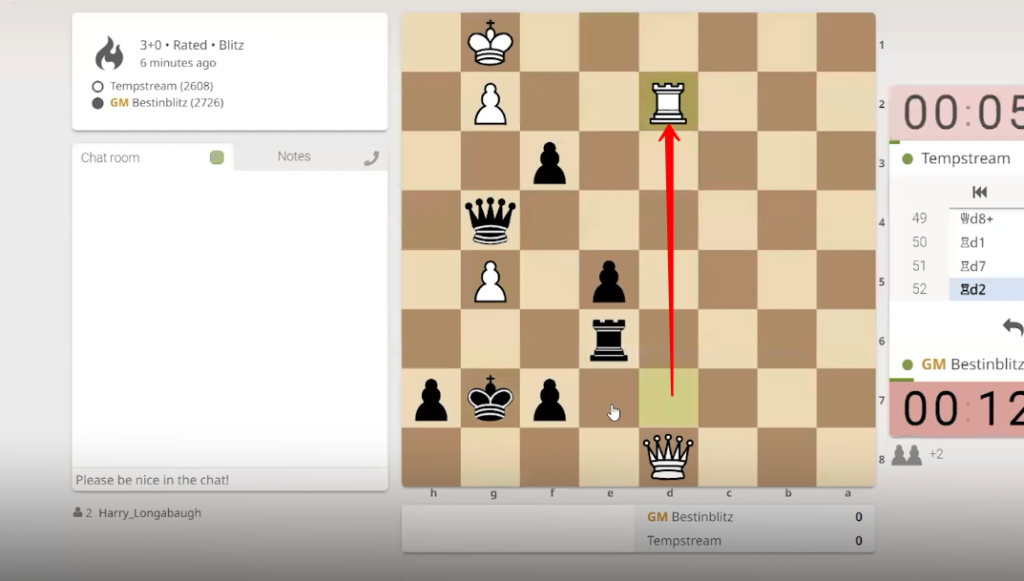
106. The black pawn moved diagonally from the “f3” to the “g2” square and captured the white pawn. Then, the white rook moved from the “d2” to the “g2” square and captured the black pawn.

107. The black queen is shifted from “g4” to “d4” square and can capture the white king.
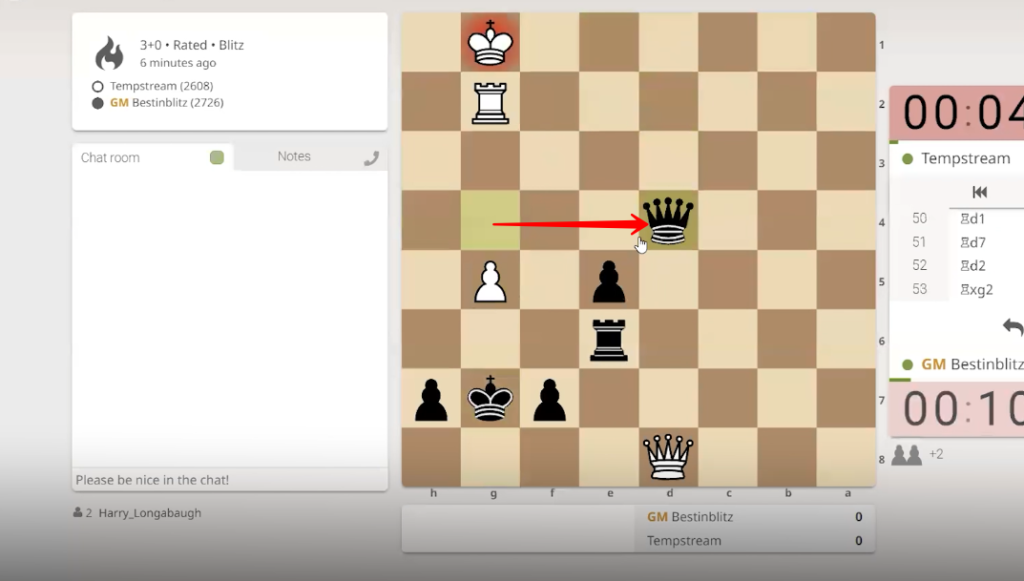
108. The white queen was displaced from “d8” to “d4” square and captured the black queen.
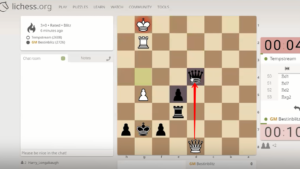
109. The black pawn is relocated from “e5” to “d4” square diagonally and captures the white queen.
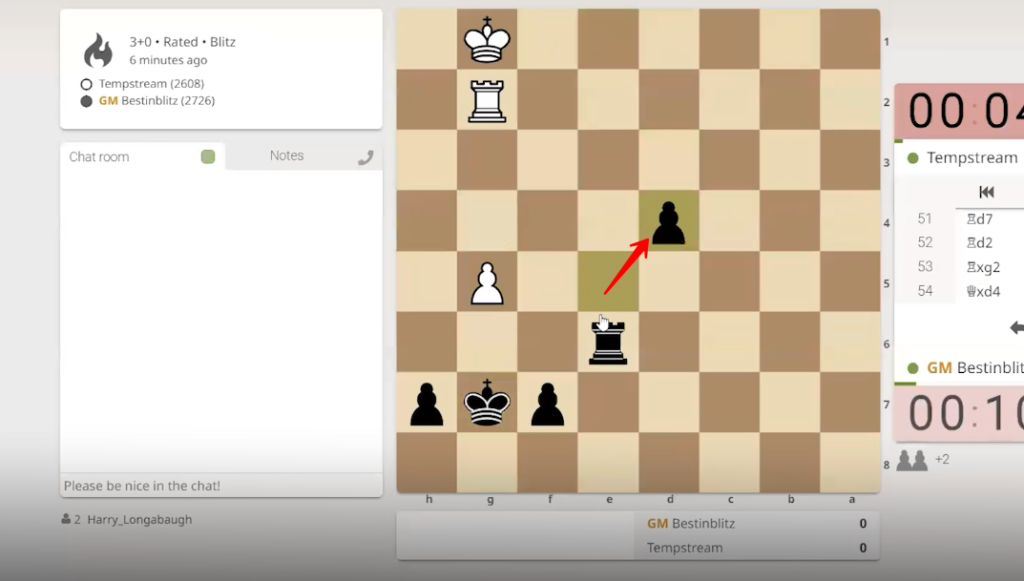
110. The white rook moved from “g2” to “d2” square.
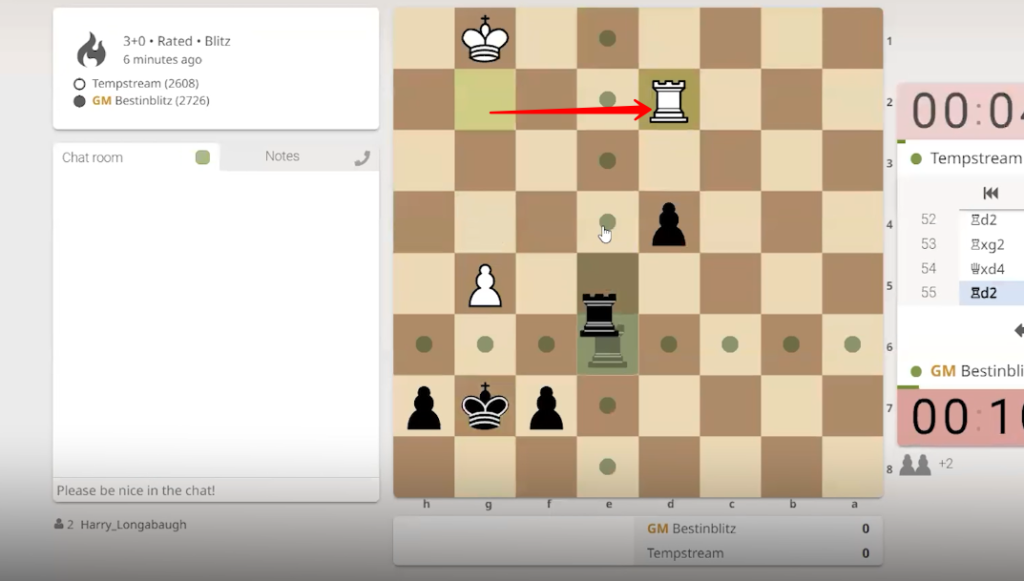
111. The black rook is relocated from “e6” to “e4” square just beside the black pawn.
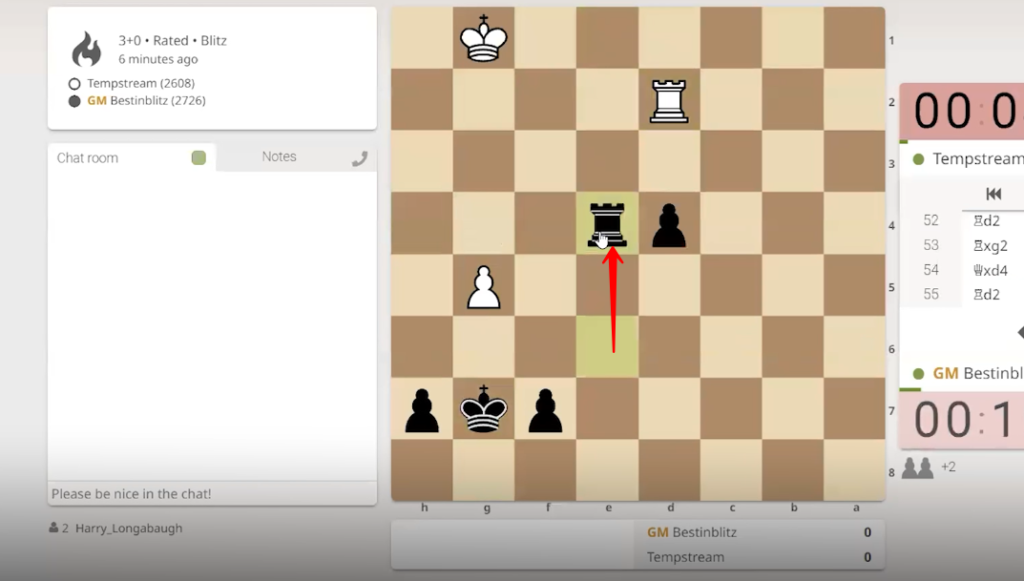
112. The white king moved diagonally from “g1” to “f2” square.
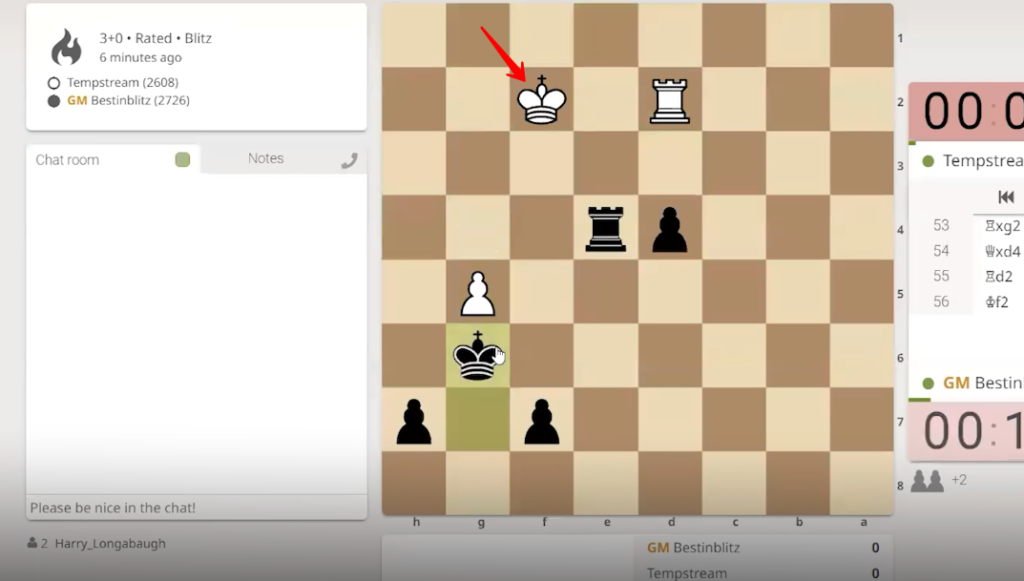
113. The black king is shifted from “g7” to “g6” square.

114. The white king is repositioned from “f2” to “f3” square.

115. The black king moved diagonally from “g6” to “f5” square.
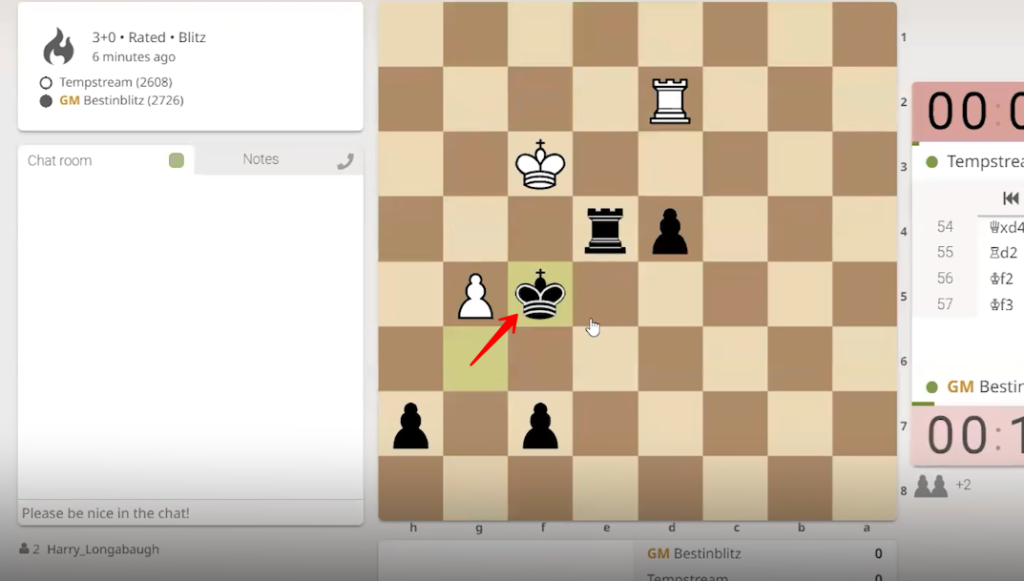
116. The white rook is relocated from “d2” to “f2” square.
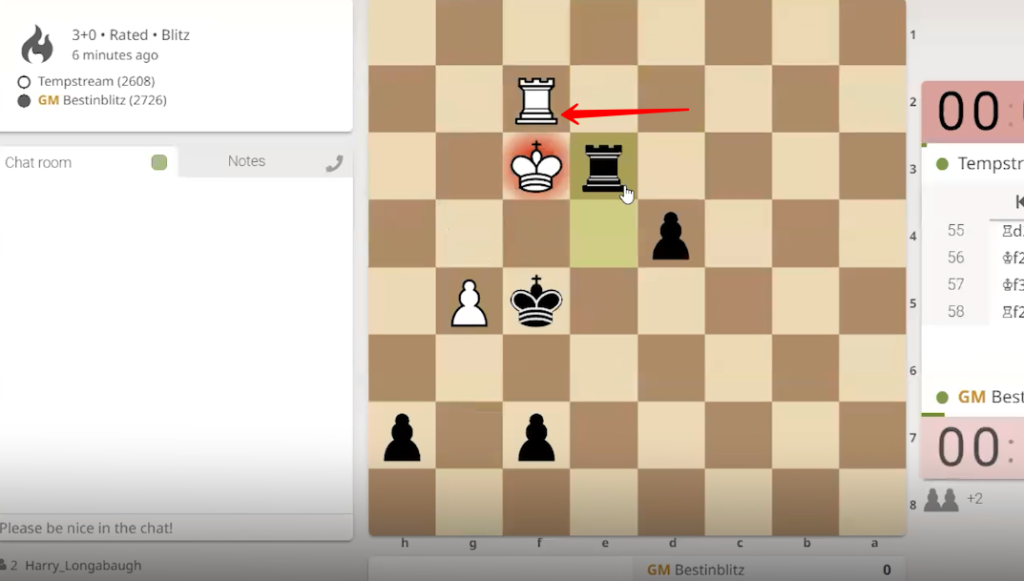
117. The black rook moved from “e4” to “e3” square and can capture the white king.
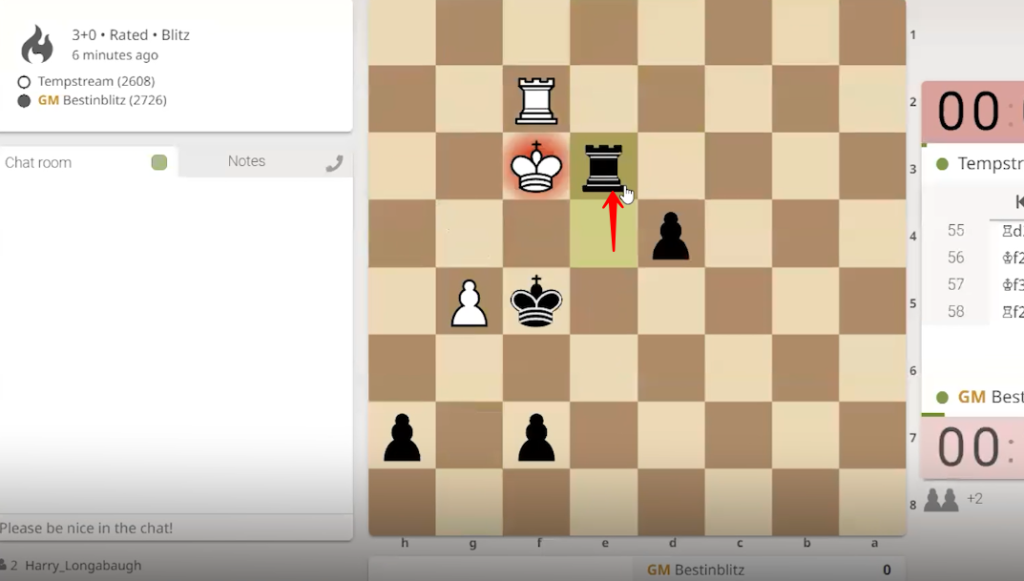
118. The white king stepped back diagonally from the “f3” to the “g2” square.
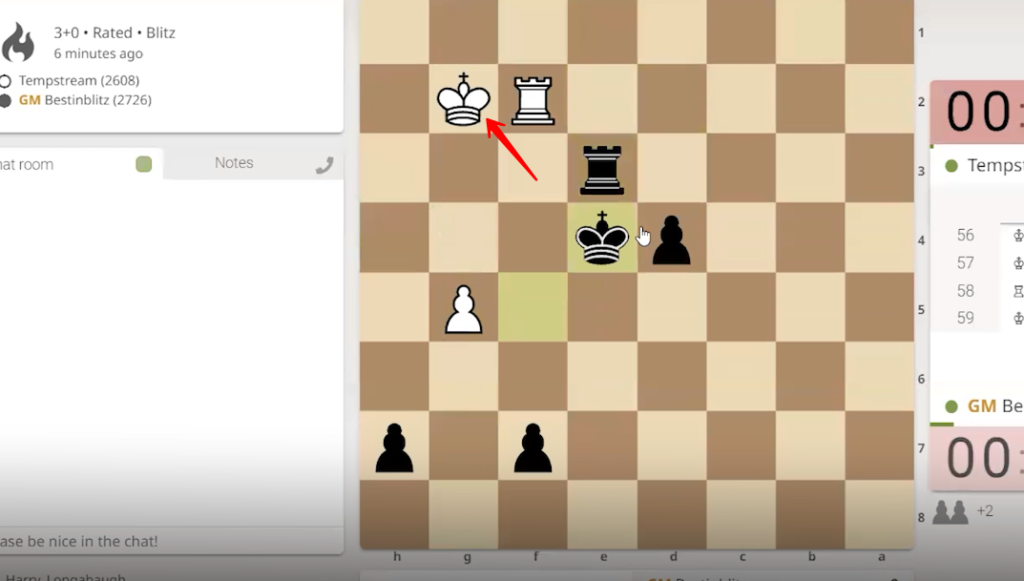
119. The black king moved diagonally from “f5” to “e4” square.
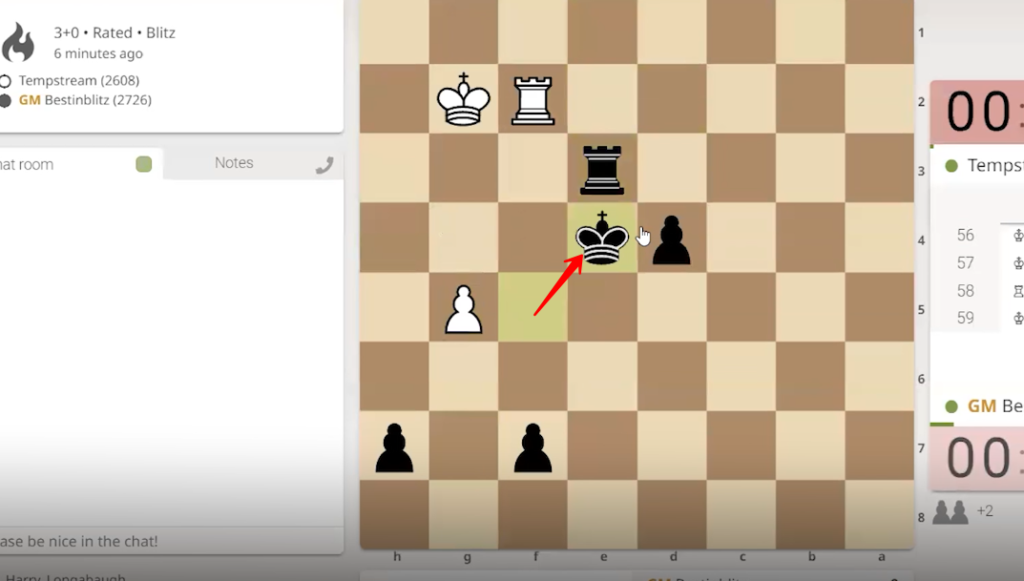
120. The white rook is shifted from “f2” to “d2” square.
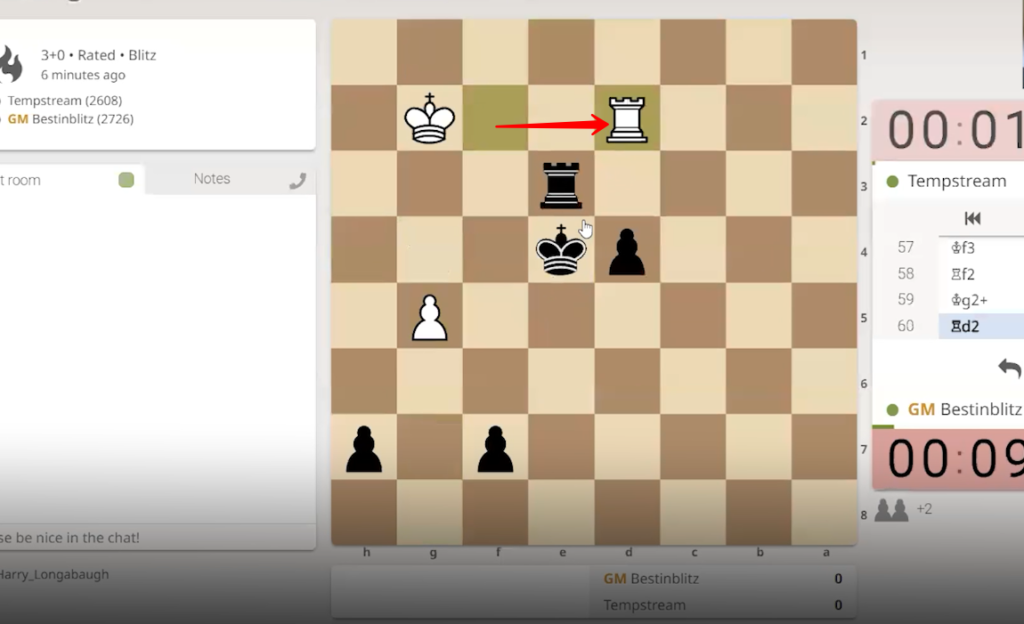
121. The black pawn moved from “d4” to “d3” square.
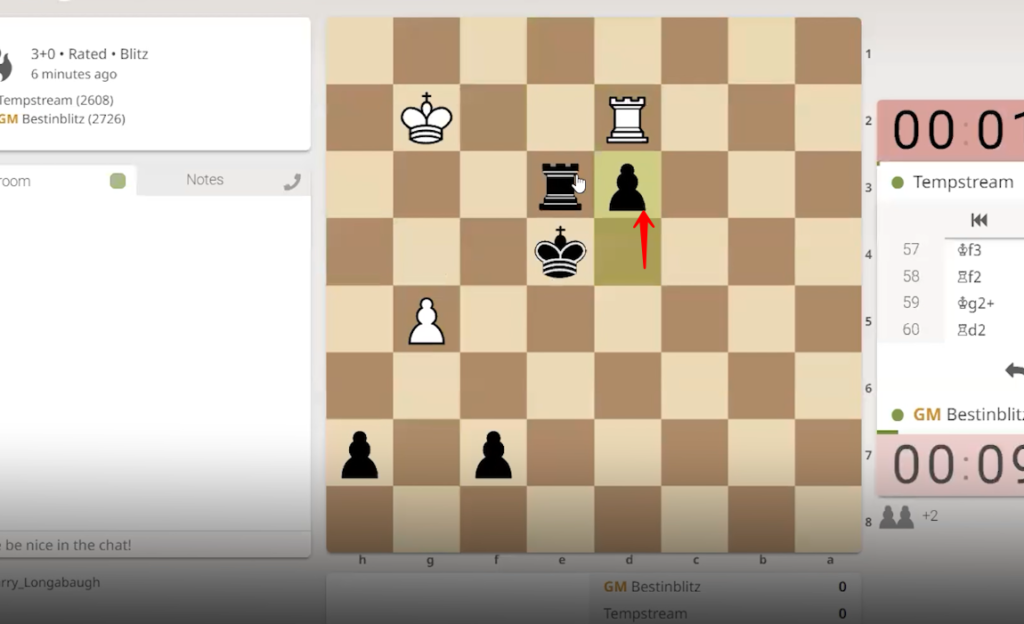
122. The white rook is repositioned from “d2” to “a2” square.
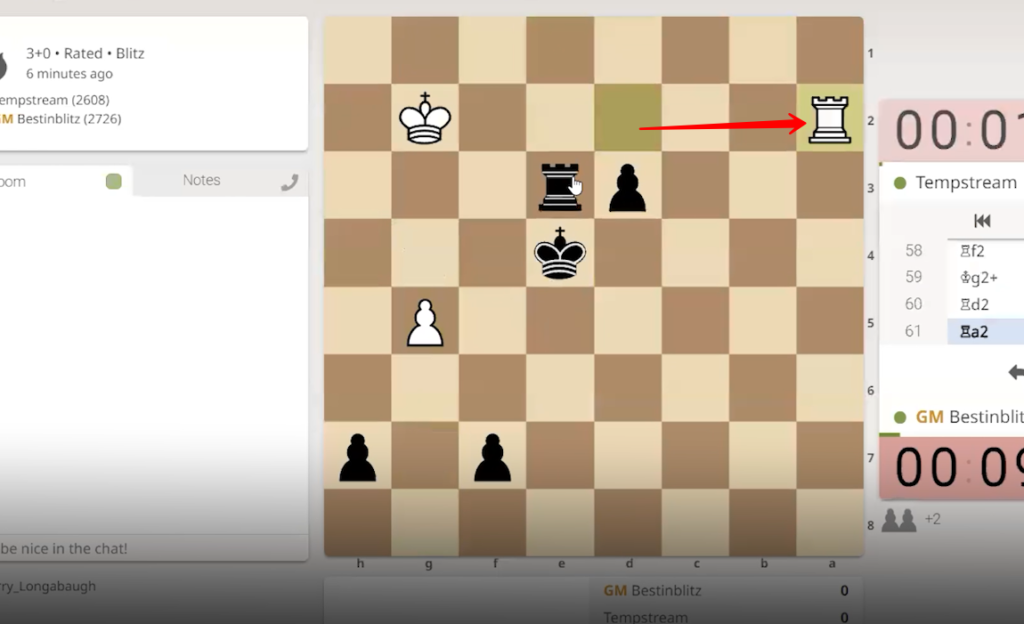
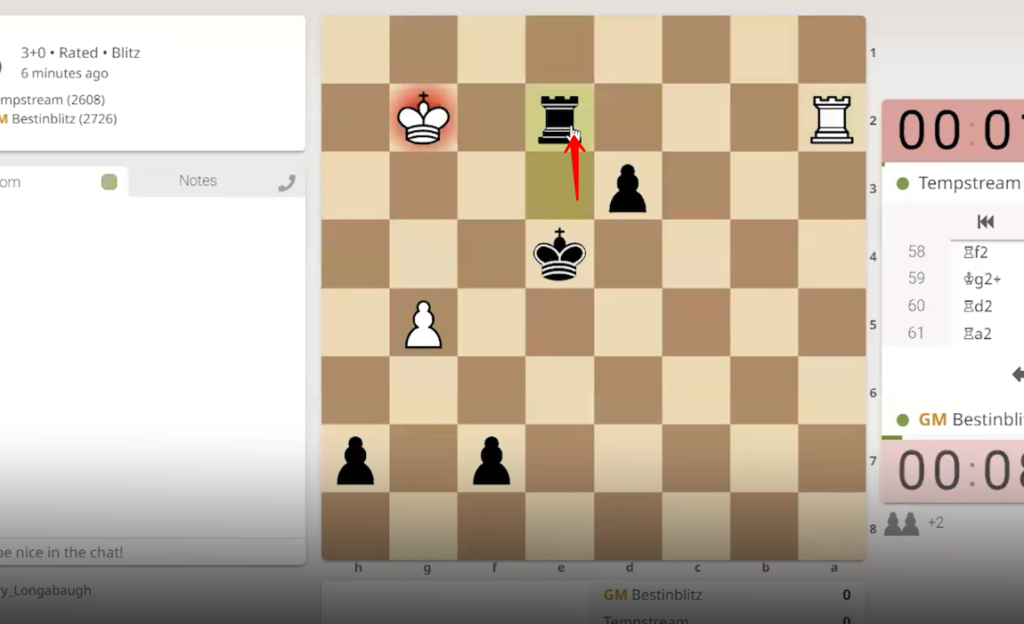
123. The black rook is relocated from “e3” to “e2” square and can capture the white king. But the time is up for the white pieces player and the black pieces player is the winner.
“You can also watch this video on Youtube”


